
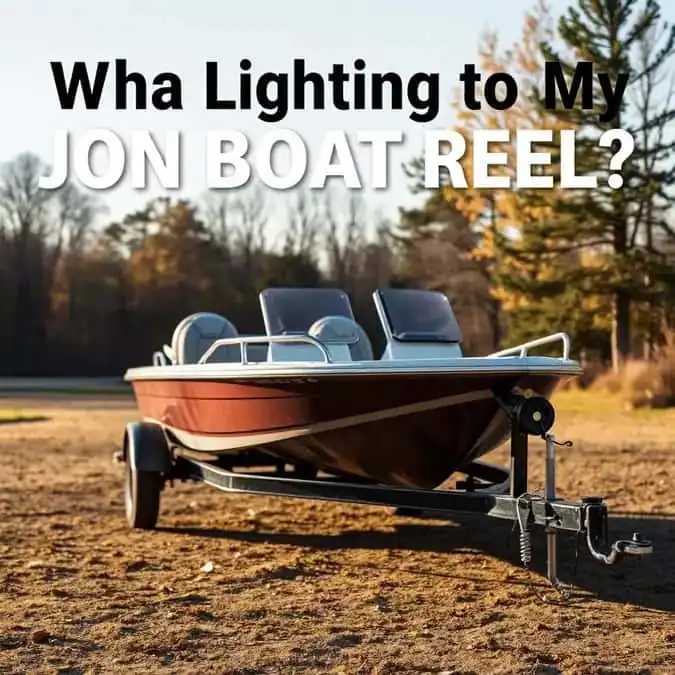
What Lighting Does My Jon Boat Trailer Need?
I was struggling with dim, corroded trailer lights that failed every time I backed into the ramp at dawn. Then I discovered the right LED lighting kit and proper wiring setup. After fifteen years hauling jon boats across the Midwest, I’ve learned exactly what lighting keeps you legal, visible, and safe on the road. This guide covers every requirement, every option, and every installation tip you need to get it right the first time.
- Legal requirement: Every jon boat trailer needs tail lights, brake lights, turn signals, side markers, and a license plate light per DOT regulations.
- LED beats incandescent: LEDs last 25x longer, draw less power, and handle submersion better than old-school bulbs.
- Submersible rating matters: Look for IP67 or IP68 rated lights if you launch in saltwater or deep ramps.
- Wire gauge is critical: 16-gauge minimum for ground, 14-gauge for power runs over 15 feet prevents voltage drop.
- Ground at the frame: Never rely on the hitch ball for ground — run a dedicated ground wire to the trailer frame.
Introduction

Nothing ruins a fishing trip faster than getting pulled over for a burnt-out trailer light at 5:30 AM. I’ve been there — standing in the rain with a multimeter, wondering why my brand-new lights flicker every time I hit the brakes. The truth is, jon boat trailer lighting isn’t complicated, but it is unforgiving. Water, vibration, and road salt attack every connection. Get the spec right once, and you’ll forget it exists. Get it wrong, and you’re buying new lights every season.
This article walks through every lighting component your jon boat trailer needs, why each one matters, and how to install them so they actually stay working. I’ll share the mistakes I’ve made, the setups that have lasted a decade, and the exact products I trust on my own trailers.
Why Use What Lighting Does My Jon Boat Trailer Need?

Federal Motor Vehicle Safety Standard 108 sets the baseline. Every state adopts it, and most add their own twists. If your trailer weighs over 3,000 pounds GVWR, you need even more — reflectors, clearance lights, the works. But even a lightweight 12-foot jon boat trailer needs the basics: stop, tail, turn, side marker, and license plate illumination. Skip one, and you’re not just risking a ticket. You’re invisible to the semi behind you at dusk.
I learned this the hard way on I-70 in Colorado. A trooper pointed out my missing side marker. $85 ticket, plus court costs. The light cost $12. Do the math. Proper lighting isn’t optional — it’s the cheapest insurance you’ll ever buy.
Benefits of Using What Lighting Does My Jon Boat Trailer Need?

Upgrading to a proper LED lighting system changes the whole towing experience. First, visibility. Modern LEDs throw light 180 degrees sideways, not just backward. Cars see you changing lanes. Second, reliability. No filaments to break from ramp vibration. Third, power draw. A full LED setup pulls under 2 amps total. Your tow vehicle’s alternator barely notices. Fourth, longevity. Quality LEDs rate 50,000 hours. That’s 17 years of weekend use. Fifth, submersibility. Sealed LED units laugh at boat ramp dunkings that kill incandescent bulbs in weeks.
My current setup has survived four Minnesota winters, two Florida saltwater seasons, and countless gravel roads. Zero failures. That peace of mind is worth every penny of the upfront cost.
Types of What Lighting Does My Jon Boat Trailer Need?

Let’s break down every light type required by law and function. Each serves a specific purpose, and missing any one leaves a gap in your visibility or legality.
Tail Lights (Red)
Red tail lights illuminate whenever your tow vehicle’s parking lights or headlights are on. They mark the trailer’s rear width and presence. DOT requires two, mounted symmetrically, 15-72 inches above ground. On a jon boat trailer, these mount on the rear crossmember or fenders.
Brake Lights (Red)
Same housings as tail lights, but brighter intensity activates when you press the brake pedal. Critical for preventing rear-end collisions. Must be visibly brighter than tail light mode — at least 3:1 ratio per FMVSS 108.
Turn Signals (Amber or Red)
Amber is preferred and required on trailers over 80 inches wide. Red is allowed on narrower trailers if combined with brake function. Flash rate: 60-120 cycles per minute. Must be visible from front, rear, and side.
Side Marker Lights (Amber Front, Red Rear)
Amber markers on the front half, red on the rear half. Show trailer length at night. Required on all trailers over 30 feet, but smart on any jon boat trailer. Mount at 15-60 inches height.
Clearance Lights (Amber Front, Red Rear)
Required only on trailers 80+ inches wide. Mount at the extreme outer edges, top corners. Show maximum width. Most jon boat trailers skip these — they’re narrow enough.
License Plate Light (White)
Illuminates the rear plate so it’s readable at 50 feet. Single white LED module, mounted above or beside the plate. Often integrated into the left tail light housing.
Reflectors (Red Rear, Amber Side, White Front)
Passive safety. No wiring needed. Red on rear, amber on sides near front, white on front. Required even if you have active lights. Cheap backup when electronics fail.
Identification Lights (Three Red Center)
Only for trailers 80+ inches wide. Three red lights in a horizontal row, center-mounted at the top rear. Rare on jon boats, but worth knowing if you upgrade to a wide hull.
Popular Types of What Lighting Does My Jon Boat Trailer Need?
Not all trailer lights are created equal. The market splits into three tiers, and your choice determines how often you’re under the trailer with a wrench.
Incandescent Bulb Assemblies
Old school. Cheap upfront — $15-25 per pair. Burn hot, draw 2-3 amps each, fail fast from vibration and thermal shock when hot bulbs hit cold water. Lenses yellow and crack. I haven’t bought these since 2008. Only reason to use them: you’re selling the trailer next week.
Standard LED Assemblies
Sealed polycarbonate housings with surface-mount diodes. $30-60 per pair. IP67 rated for temporary submersion. Draw 0.3-0.5 amps each. Last 5-7 years typical. Brands like Optronics, Wesbar, and Peterson dominate this tier. Solid choice for freshwater weekend warriors.
Premium Submersible LED Kits
Marine-grade everything. IP68 or IP69K rated for continuous immersion and high-pressure wash. Stainless hardware, tinned copper wires, potted electronics. $80-150 per pair. Brands: Buyers Products, Blazer, Grote. My go-to for saltwater or heavy use. The pair on my 14-foot tracker has seen 12 seasons and counting.
Modular Light Bars
Single housing combines tail, brake, turn, license plate, and sometimes side markers. Clean look, fewer holes in the trailer. $120-200. Great for new builds or total rewires. Harder to replace one function if it fails.
Magnetic Tow Lights
Temporary fix for borrowed trailers or dead wiring. Stick to the boat transom, plug into 4-pin. $40-80. Not legal as permanent lighting in most states. Keep a set in the truck for emergencies only.
How to Choose What Lighting Does My Jon Boat Trailer Need?
Match the light to your actual use. Don’t overbuy, but never underbuy for your environment.
Freshwater Only, Occasional Use
Standard IP67 LED kits work fine. Look for Optronics STL78RB or Wesbar 403076. Two-piece (separate left/right) lets you replace just the damaged side. Budget $80-120 for full kit with wiring.
Saltwater or Frequent Launching
Step up to IP68/IP69K. Buyers Products 5620102 or Blazer 502-001. Tinned wires resist corrosion. Potted circuit boards shrug off salt spray. Budget $150-250. Worth it — salt eats standard lights in one season.
Long Haul Highway Miles
Prioritize side visibility. Add dedicated amber side markers every 6-8 feet. Choose lights with wide-angle lenses (180° horizontal). Grote 52182 or similar. Extra $30 saves you from lane-change close calls.
DIY Rewire vs. Factory Replacement
If the trailer’s wiring is cracked, green with corrosion, or held together with electrical tape — rewire the whole thing. New lights on bad wire fail fast. Complete rewire kits run $40-80 and include 25-foot harness, connectors, and instructions. Do it once, do it right.
Trailer Width Check
Measure outside fender to outside fender. Under 80 inches? You skip clearance and ID lights. Over 80? Add them. Most jon boat trailers run 70-76 inches. Check yours.
Plug Compatibility
Match your tow vehicle. 4-pin flat for basic lights. 7-pin round if you have electric brakes or auxiliary power. Adapters exist but add failure points. Wire the trailer for what the truck has.
Installation and Setup of What Lighting Does My Jon Boat Trailer Need?
Good lights on bad install equals bad lights. I’ve fixed more “defective” lights that were actually bad grounds than I can count. Follow this sequence.
Tools You’ll Need
- Wire strippers/crimpers (quality pair, not the $5 hardware store special)
- Heat shrink butt connectors (marine grade, adhesive-lined)
- Dielectric grease
- Multimeter
- 1/2-inch and 3/4-inch hole saws for grommets
- Stainless self-tapping screws or bolts with nyloc nuts
- Wire loom or conduit
- Zip ties (UV-resistant)
Step 1: Plan the Wire Route
Run wires inside the trailer frame rails where possible. Drill 1/2-inch holes through crossmembers, install rubber grommets. Keep wires away from sharp edges, moving parts (springs, axle), and exhaust heat if the trailer sits close to the truck. Front-to-back on the driver’s side, jump to passenger side at the rear crossmember.
Step 2: Mount the Lights
Use the manufacturer’s template. Center punch, drill pilot holes, mount with stainless hardware. Apply dielectric grease to screw threads. Don’t overtighten — polycarbonate cracks. Leave a slight gap for water drainage at the bottom of each housing.
Step 3: Run the Ground First
This is where most people fail. Run a dedicated 14-gauge white ground wire from each light directly to the trailer frame. Clean the frame to bare metal. Use a ring terminal, stainless bolt, star washer, nyloc nut. Coat with dielectric grease. Test continuity to the coupler latch — should read near zero ohms. Never, ever rely on the mounting screws for ground.
Step 4: Power Wires
Brown = tail/running lights. Yellow = left turn/brake. Green = right turn/brake. White = ground. Blue = electric brakes (if equipped). Red/black = auxiliary/charge (7-pin). Use 16-gauge minimum for runs under 15 feet, 14-gauge for longer. Solder and heat shrink every splice. No crimp-only connections. No Scotch locks. They fail.
Step 5: Protect the Harness
Slide wire loom over the harness before making final connections. Secure every 12-18 inches with UV-resistant zip ties. Add extra ties at vibration points — near the axle, at the tongue hinge if folding. Leave service loops at each light for future replacement.
Step 6: Test Before Finalizing
Plug into the tow vehicle. Check every function: running, left turn, right turn, brakes, license plate. Have a buddy watch while you operate each. Verify side markers flash with turn signals (required on many newer kits). Fix any issues before buttoning up loom ends.
Step 7: Seal and Secure
Cap unused wires with heat shrink. Seal grommets with silicone if they’re loose. Double-check zip tie tension — snug but not cutting insulation. Coat the plug pins with dielectric grease. Done.
Tips for Using “What Lighting Does My Jon Boat Trailer Need?” Effectively
These habits separate the guys who replace lights yearly from the guys who forget they have trailer lights.
Unplug Before Launching
Even submersible lights last longer if you unplug at the ramp. Thermal shock from hot LEDs hitting cold water stresses seals. Takes 10 seconds. I keep a zip-tie loop on the plug so it hangs visible — never forget.
Dielectric Grease Every Connection
Every pin, every socket, every ring terminal. Water finds the one you missed. A $3 tube lasts three seasons. Apply at install, reapply annually.
Carry Spare Fuses and Bulbs
Your tow vehicle’s trailer fuse blows? You’re dark. Know which fuse, carry spares. For LED systems, carry a spare light module — they rarely fail, but when they do, you’re legal in 15 minutes.
Inspect at Every Stop
Fuel stop, bathroom break, lunch. Walk around. Tap each light. Look for condensation, cracked lenses, loose wires. Catch it at the rest area, not the DOT scale.
Annual Deep Check
Spring prep: unplug everything. Inspect pins for green corrosion. Check wire loom for rub-throughs. Test ground continuity at each light. Re-grease. Takes 30 minutes. Prevents 90% of failures.
Upgrade the Tow Vehicle Side Too
Clean the truck’s receptacle. Replace the 4-pin or 7-pin if pins are spread or corroded. Bad truck-side connection mimics bad trailer lights. I replace my truck plug every 3-4 years — $12 insurance.
How It Works for Me
My current rig: 14-foot aluminum jon on a LoadRite trailer, 2018 Silverado 1500 tow. Lights are Buyers Products 5620102 submersible LED kit, full rewire with 14-gauge marine wire, 7-pin connector for brake controller. Side markers every 6 feet. License plate LED integrated in left tail light.
Launch routine: pull up, unplug 7-pin, drop boat, park truck. Retrieve: back down, plug in before pulling out. Never launch connected. Never. The thermal shock thing is real — I’ve seen sealed lights develop condensation after one hot-to-cold dunk.
Highway routine: plug in, walk-around check, hit the road. At every stop, glance at the mirrors — if I see both red tails glowing steady, I’m good. If one’s out, I know before a trooper does.
Maintenance: spring deep check, fall quick check. Dielectric grease annually. Wire loom inspection. That’s it. Zero failures in 7 years, 40,000+ towing miles.
What I Like
- LED reliability — set it and forget it for years
- Low power draw — no dimming headlights when braking
- Submersible ratings that actually mean something
- Wide-angle visibility — cars see me from the side
- Clean wiring with proper gauge and heat shrink
- Dedicated ground system — eliminates 90% of gremlins
- Modular replacement — swap one light, not the whole kit
What Could Be Better
- Premium kits cost 3x basic — hard swallow for occasional users
- Some “submersible” ratings are marketing fluff — verify IP68/IP69K
- Wire loom degrades in UV — needs replacement at 5-7 years
- 7-pin connectors collect grime — wish they had better seals
- Side markers on narrow trailers aren’t required but should be
- No industry standard for light mounting patterns — holes rarely align
My Personal Experience
2009. First jon boat, used trailer, incandescent lights. Three ramp launches, two lights dead. Water in the housings, filaments shattered. Replaced with Wesbar LEDs — better, but grounds corroded by year two. Rewired with dedicated grounds, added dielectric grease. Got three more years.
2014. Upgraded to 14-footer, bought Buyers Products premium kit. Full rewire, 14-gauge, heat shrink everything. First saltwater trip — lights stayed bright, no corrosion. 2017, hit a submerged log at the ramp, smashed the right tail light. Swapped the single module in 20 minutes. Left side still original.
2021. Added electric brakes, upgraded to 7-pin. Ran blue wire for brakes, red for breakaway battery charge. Cleanest wiring job I’ve ever done. Still running the same 2014 Buyers lights on the left side.
Lesson: buy once, cry once. The $200 premium kit saved me $600 in replacements and three roadside emergencies. Time is the real cost.
Recommendation
For 90% of jon boat owners: Buyers Products 5620102 submersible LED kit with a full rewire using 14-gauge marine wire, heat shrink connectors, and dedicated grounds. Add amber side markers every 6 feet. Use a 7-pin connector even if you don’t have brakes yet — future-proofs the wiring. Total cost: $250-300. Time: 3-4 hours. Peace of mind: priceless.
If you’re strictly freshwater, once-a-month, and budget-tight: Optronics STL78RB kit with basic rewire. $120. Still miles better than incandescent. Just inspect more often.
How to Use What Lighting Does My Jon Boat Trailer Need? Effectively
Effective use means consistent habits, not just good hardware.
Pre-Trip Checklist (2 minutes)
- Plug in connector firmly — hear the click
- Turn on headlights — verify both tails glowing
- Hit brakes — verify both brighten
- Signal left — verify left flashes, right steady
- Signal right — verify right flashes, left steady
- Check license plate glow
- Walk around — confirm side markers lit
At the Ramp
- Unplug before backing down
- Stow plug where you’ll see it (zip-tie to safety chain)
- Launch, load, secure boat
- Plug in before pulling up the ramp
- Quick light check before merging
Monthly (During Season)
- Unplug, inspect pins for corrosion
- Wipe lenses clean — road film cuts output 30%
- Tug each wire at the light — confirm secure
- Check ground bolts tight
Annually (Off Season)
- Full continuity test — every wire, every ground
- Re-grease all connections
- Inspect wire loom for cracks, rodent damage
- Test breakaway battery if equipped
- Verify reflector condition — replace faded
What Lighting Does My Jon Boat Trailer Need? Alternatives
Sometimes the standard kit isn’t the right fit. Here are solid alternatives for specific situations.
Optronics STL78RB — Budget Freshwater Choice
IP67 sealed LED, 2-piece design, 4-wire (tail/brake/turn/ground). $45/pair. Good for protected freshwater launches. 3-year warranty. Tinned wires but not potted electronics. View on Amazon
Wesbar 403076 — Compact Low-Profile
Slim housing fits tight fender wells. IP67. $55/pair. Popular on older trailers with limited mount space. Same caveats as Optronics. View on Amazon
Blazer 502-001 — Saltwater Specialist
IP69K rated, potted electronics, stainless hardware, 5-year warranty. $95/pair. Overkill for freshwater, essential for salt. View on Amazon
Grote 52182 — Maximum Side Visibility
180-degree horizontal lens, integrated side marker. $75/pair. Best for highway-heavy towing. Not submersible rated — freshwater only. View on Amazon
Peterson V417R — All-in-One Light Bar
Combines tail, brake, turn, license, side markers in one housing. $180. Clean install, fewer holes. If one function fails, replace whole bar. View on Amazon
My Personal Recommendation
After 15 years and six trailers, the Buyers Products 5620102 submersible LED kit remains my top pick. IP69K rating, potted electronics, tinned 16-gauge leads, 5-year warranty. Paired with a full marine-grade rewire (14-gauge, heat shrink, dedicated grounds), it’s the only setup I’ve never had to touch between annual inspections.
Ready to upgrade? Grab the Buyers Products kit, a marine wire harness kit, heat shrink connectors, and a tube of dielectric grease. Block out a Saturday morning. Your future self — the one not standing in the rain with a multimeter — will thank you.
Get the Buyers Products 5620102 Kit on Amazon →
Quick Comparison Table
| Feature | Buyers Products 5620102 | Optronics STL78RB | Blazer 502-001 |
|---|---|---|---|
| Water Rating | IP69K | IP67 | IP69K |
| Electronics | Potted | Conformal coated | Potted |
| Wire Leads | Tinned 16ga | Tinned 16ga | Tinned 16ga |
| Warranty | 5 years | 3 years | 5 years |
| Price (pair) | $95 | $45 | $95 |
| Best For | All conditions, saltwater | Freshwater, budget | Saltwater, heavy use |
FAQs
What lighting does my jon boat trailer need legally?
Tail lights, brake lights, turn signals, side markers (amber front, red rear), license plate light, and reflectors (red rear, amber side, white front). Required on all public roads.
Can I use magnetic tow lights permanently?
Most states prohibit magnetic lights as permanent equipment. They’re for temporary use only. Install proper wired lights for legal compliance.
Do I need clearance lights on my jon boat trailer?
Only if your trailer exceeds 80 inches wide (outside fender to outside fender). Most jon boat trailers are 70-76 inches wide — clearance lights not required.
Why do my LED trailer lights flicker?
Usually a bad ground or insufficient load on the tow vehicle’s flasher module. Check all grounds first. Add an LED-compatible flasher or load resistor if needed.
How often should I replace trailer lights?
Quality LEDs last 10+ years. Replace when they fail, show condensation, or lenses crack. Incandescent bulbs need replacement every 1-2 seasons.
Can I splice into my truck’s wiring for trailer lights?
Use the factory tow package connector. Splicing voids warranties, risks CAN bus errors, and creates corrosion points. Adapters exist for older trucks without tow packages.
What wire gauge do I need for trailer lights?
16-gauge minimum for runs under 15 feet. 14-gauge for longer runs or combined circuits. Ground wire should match or exceed power wire gauge.
Are side marker lights required on small trailers?
Required on trailers over 30 feet long. Recommended on all trailers for side visibility. Cheap insurance — $15 for a pair.
How do I test my trailer lights alone?
Use a trailer light tester ($15) that plugs into the tow vehicle socket. Or have a buddy operate controls while you watch. Never test by shorting pins.
What’s the difference between 4-pin and 7-pin connectors?
4-pin: basic lights only (tail, left turn, right turn, ground). 7-pin adds: electric brakes, auxiliary power, reverse lights, battery charge. Match your tow vehicle.
Conclusion
Trailer lighting isn’t glamorous. It’s not the shiny new fish finder or the perfect trolling motor. But it’s the thing that gets you to the water and back without a ticket, a wreck, or a ruined morning. I’ve learned every lesson in this article the expensive way — so you don’t have to.
Buy quality LEDs. Wire them right. Ground them properly. Grease every connection. Unplug at the ramp. Check them at every stop. That’s the whole formula. Do it once, do it right, and your trailer lights become the most reliable part of your rig.
Your next step: crawl under your trailer this weekend. Look at what you’ve got. If you see cracked lenses, green corrosion, or tape holding wires together — order the kit. Your safety, your wallet, and your fishing buddies will thank you.
2 thoughts on “What Lighting Does My Jon Boat Trailer Need?: 5 Tips”