
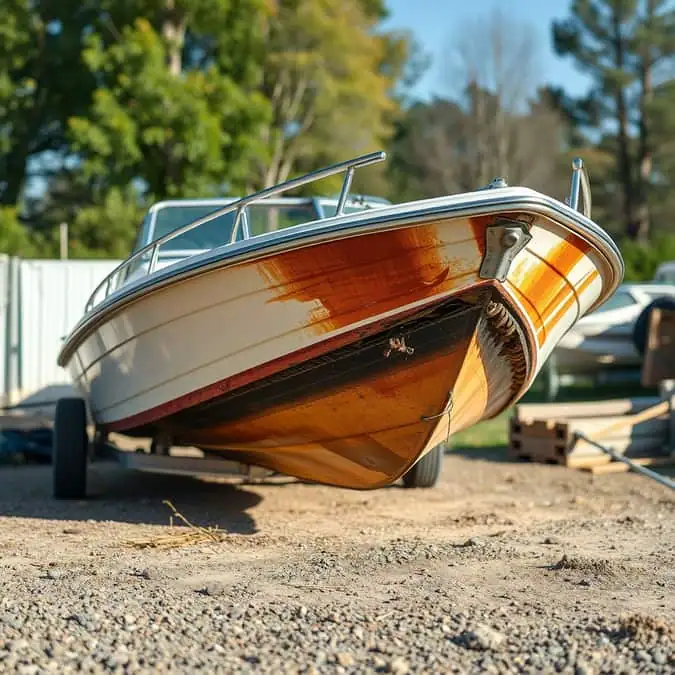
Signs of Hull Damage on Jon Boat After Storage: What Every Owner Needs to Know
I was struggling with a jon boat that looked fine in the garage all winter but started taking on water the first time I launched it in spring. Then I discovered a systematic way to catch hull damage before it ruins your season. After fifteen years of owning flat-bottoms and helping buddies fix theirs, I’ve learned that storage damage is sneaky, expensive, and almost entirely preventable if you know where to look.
- Storage kills jon boats silently — moisture, temperature swings, and pests cause damage you won’t see until you’re on the water
- Aluminum fatigue shows early — stress cracks, rivet weeping, and corrosion powder appear months before structural failure
- Transom and floor rot are the real killers — plywood cores trap water and rot from inside out, often invisible from outside
- A $15 flashlight and 20 minutes saves thousands — systematic inspection catches 95% of issues before launch day
- Document everything with photos — year-over-year comparison reveals slow progression that memory misses
Introduction

That first warm Saturday in April feels like Christmas morning for jon boat owners. You pull the cover off, hit the key, and expect to hear that sweet two-stroke bark or four-stroke purr. What you don’t expect is the bilge pump cycling every three minutes because water’s sneaking in through a crack you never knew existed.
I’ve been there. Opening day 2019, my 16-foot Tracker started taking on water three miles from the ramp. A hairline fracture along the chine — caused by a mouse nest holding moisture against the aluminum all winter — had grown into a three-inch split. Tow bill: $280. Repair: $1,200. Lost fishing days: priceless.
Jon boats are tough, but they’re not invincible. Their flat bottoms, riveted seams, and plywood-cored transoms make them uniquely vulnerable to storage-related damage. The good news? Every major failure leaves clues. This guide walks you through every sign of hull damage on jon boat after storage, drawn from real repairs, painful lessons, and conversations with marine surveyors who’ve seen it all.
Why Inspect for Signs of Hull Damage on Jon Boat After Storage

You might wonder why a dedicated inspection matters when you’ll “just see it” at the ramp. Here’s the hard truth: by the time damage is obvious at the launch, it’s already expensive. A systematic post-storage inspection catches problems when they’re $50 fixes instead of $1,500 rebuilds.
Jon boats face unique storage threats. Their flat bottoms collect water, leaves, and debris that hold moisture against aluminum for months. Riveted seams create thousands of tiny entry points for water. Plywood transoms and floors — standard on most production jon boats — wick water like a sponge once the seal breaks. And unlike fiberglass boats, aluminum shows fatigue through microscopic cracks that grow exponentially under load.
Insurance data from BoatUS shows that 34% of jon boat claims involve damage that occurred during storage or was exacerbated by it. The average claim: $2,800. A thorough inspection takes 20 minutes and costs nothing but time.
Beyond money, there’s safety. A compromised transom can fail under motor torque. A cracked chine can fold on a hard turn. Floor rot can drop you through the deck. These aren’t hypothetical — I’ve seen all three happen to friends who skipped the spring check.
Benefits of Checking Signs of Hull Damage on Jon Boat After Storage

The payoff for a disciplined inspection routine goes way beyond avoiding repair bills. Here’s what consistent checking buys you:
- Launch-day confidence: You know your boat is sound before you back down the ramp. No wondering, no bilge pump anxiety, no cutting the trip short.
- Early intervention savings: A weeping rivet caught in March gets a dab of marine sealant. The same rivet ignored until July needs drilling, reaming, and solid rivet replacement — ten times the labor.
- Resale documentation: Buyers pay premium for jon boats with photo-documented maintenance histories. My last boat sold in three days because I handed the buyer a three-ring binder of dated inspection photos.
- Pattern recognition: Year-over-year photos reveal slow corrosion creep, stress crack progression, and coating failure before they become structural.
- Pest damage detection: Mice, wasps, and carpenter ants love stored jon boats. Early evidence means simple cleanup instead of wiring harness replacement or foam removal.
- Trailer synergy: While you’re under the hull, you’ll spot trailer issues too — bunk wear, roller flat spots, winch strap fray — that could strand you.
The ROI on 20 minutes of inspection is effectively infinite. One caught transom rot saves the entire boat value.
Types of Signs of Hull Damage on Jon Boat After Storage

Not all hull damage looks the same. Understanding the categories helps you recognize what you’re seeing and gauge urgency.
Structural Fatigue Signs
Aluminum work-hardens and fatigues over time. Storage doesn’t cause this directly, but temperature cycling and improper support accelerate it. Look for:
- Hairline cracks radiating from rivet holes, especially along chines and keel
- Stress lines at transom corners where motor torque concentrates
- Oil-canning — visible waviness in flat panels indicating lost stiffness
- Rivet pattern distortion — rows that should be straight showing subtle waves
Corrosion Indicators
Galvanic and crevice corrosion thrive in stored boats. Key markers:
- White powdery deposits (aluminum oxide) around rivets, seams, and hardware mounts
- Pitting — tiny craters in the surface, often clustered near waterline or drain areas
- Discoloration streaks running from fasteners or seams
- Sacrificial anode depletion beyond 50% — means the boat’s been fighting corrosion alone
Moisture Intrusion Evidence
Water is the universal enemy. Storage traps it in places rain never reaches:
- Standing water in bench seats, under floor panels, in bow compartments
- Water stains on interior surfaces — tea-colored streaks on aluminum, dark patches on paint
- Musty, swampy smell when you first pull the cover — that’s active mold
- Efflorescence on concrete floor under the boat — white mineral deposits mean the hull wept all winter
Transom and Floor Core Failure
The silent killer. Plywood cores rot from inside while the aluminum skin looks perfect:
- Soft spots when you press firmly on transom corners and motor mount area
- Spongy feel underfoot walking the floor — especially near seat bases and console
- Rust stains bleeding through aluminum from interior fasteners
- Motor mount bolts that spin or pull loose — the wood behind them has turned to mush
Pest and Environmental Damage
Nature doesn’t respect your garage:
- Mouse nests in foam flotation — they chew wiring and hold moisture against hull
- Wasp nests in drain holes and under gunwales — block drainage, cause water backup
- Carpenter ant trails — they don’t eat aluminum but they excavate foam and wood
- UV degradation on exposed gel coat or paint — chalking, fading, cracking clear coat
- Cover chafe marks — straps and tie-downs rubbing through paint to bare metal
Popular Types of Signs of Hull Damage on Jon Boat After Storage
Certain damage patterns show up on jon boats with predictable regularity. Knowing the “greatest hits” focuses your inspection.
Chine Crack Syndrome
The chine — where bottom meets side — takes the brunt of trailering stress, beaching impact, and storage pressure points. Cracks here usually start at rivet holes and run parallel to the chine. They’re the single most common structural issue I see.
Why chine cracks love storage: improper blocking lets the hull sag between supports, flexing the chine repeatedly through freeze-thaw cycles. Always block under ribs, not between them.
Rivet Weep Lines
Rows of tiny corrosion streaks below rivet heads. Each streak is a rivet that’s lost its seal. On a 16-footer you might have 200+ rivets below the waterline. Ten weeping rivets is a Sunday project. Fifty means pull the boat and reseam.
Transom Rot at Motor Mount
Almost universal on boats over 15 years old. The upper motor mount bolts penetrate the transom core. Water wicks down the bolt shanks. The plywood rots, bolts loosen, the motor vibrates more, accelerating the damage. Check by wiggling the motor — any movement at the transom is bad news.
Bench Seat Floor Rot
Seat bases trap water against the floor. The plywood rots, the seat gets loose, the owner bolts it tighter, crushing the remaining wood. Pull seat cushions, probe with an awl. If it penetrates more than 1/8 inch, you’re cutting floor panels.
Keel Guard Wear-Through
Many jon boats have aluminum keel guards or extruded keel keels. Concrete ramps, rocky beaches, and trailer rollers wear them paper-thin. Once the guard fails, the hull bottom wears fast. Run your finger along the keel — feel for sharp edges or paper-thin sections.
Drain Plug Thread Damage
Garage-stored boats often sit with the plug out. The threads corrode, the plug won’t seal, or worse — the plug body cracks from freeze expansion of trapped water. Always inspect threads and carry a spare plug.
How to Choose Your Inspection Approach for Signs of Hull Damage on Jon Boat After Storage
Not every owner needs the same inspection depth. Match your approach to your boat’s age, storage conditions, and your risk tolerance.
The Quick Walkaround (5 Minutes)
Best for: Newer boats (under 5 years), indoor heated storage, freshwater use only.
- Pull cover, smell for mustiness
- Check drain plug, bilge area
- Visual scan of bottom and sides for obvious damage
- Wiggle motor, check transom flex
- Press floor in four spots
The Standard Inspection (20 Minutes)
Best for: Most boats 5-15 years old, outdoor or unheated storage, mixed water use.
- Everything in Quick Walkaround plus:
- Bright flashlight inspection of every rivet row below waterline
- Awl probe of transom corners and floor around seats
- Check all through-hull fittings, livewell drains, bilge pump
- Inspect trailer bunks, rollers, winch, lights
- Photo-document any findings with date stamp
The Deep Survey (60+ Minutes)
Best for: Boats over 15 years, known prior damage, saltwater use, long-term storage (6+ months).
- Everything in Standard plus:
- Remove floor panels for core inspection
- Pull seats for foam and wiring check
- Moisture meter readings on transom and floor (target: under 15%)
- Rivet-by-rivet audit with marker system
- Trailer bearing inspection and repack
- Full electrical system load test
My rule: do the Standard every spring. Do the Deep Survey every third year, or after any season where you hit something hard, ran aground, or stored in questionable conditions.
Inspection Setup for Signs of Hull Damage on Jon Boat After Storage
Good inspection starts with good setup. Don’t crawl around on concrete with a dying penlight.
Essential Tools
- High-lumen flashlight (500+ lumens): Streamlight ProTac or similar. You need to see inside rivet holes.
- Awl or ice pick: For probing wood cores. Hardened tip, comfortable handle.
- Moisture meter (pinless): Wagner MMC220 or equivalent. Non-destructive, reads through aluminum.
- Mechanic’s mirror: 2-inch round on telescoping handle. Sees up under gunwales and transom.
- Magnet: Simple test — aluminum isn’t magnetic. If your magnet sticks, someone patched with steel.
- Camera/phone: Date-stamped photos for comparison. Shoot wide then close.
- Notebook or inspection app: Record findings, locations, severity. I use a waterproof field notebook.
- Knee pads and creeper: Your back will thank me.
Environment Setup
- Boat on trailer, level, well-lit (garage door open or shop lights)
- Cover completely removed — not folded back, off
- All compartments open, cushions removed, floor hatches up
- Drain plug out, bow high enough to drain
- Battery disconnected (safety) but available for bilge pump test
Lighting Strategy
Light angle reveals what straight-on misses. Shine your light across surfaces at 15-30 degrees — this “raking light” shows oil-canning, stress lines, and tiny cracks that disappear under direct light. Do this inside and out, bottom to top.
Tips for Using Your Signs of Hull Damage on Jon Boat After Storage Checklist Effectively
A checklist is only as good as the discipline behind it. These habits separate thorough inspections from box-checking exercises.
Follow the Water
Water always takes the path of least resistance. Trace every potential entry point: drain plug, livewell fittings, bilge pump through-hull, transducer, speedometer pickup, motor mount bolts, rub rail screws, cleat bolts. Spray each with a hose (gentle) and watch inside for weeping. Do this before launch day.
Use the Marker System
Found a weeping rivet? Mark it with a silver Sharpie dot on the rivet head. Found a stress line? Mark both ends. Next year, you’ll know instantly if it’s grown. Different colors for different years — red for 2024, blue for 2025, etc.
Photograph With Scale
Close-ups without scale are useless for comparison. Include a coin, ruler, or your finger in every detail shot. Shoot perpendicular to the surface, not at an angle. Consistent lighting (overcast day or same shop lights) makes year-over-year comparison valid.
Check the “Boring” Stuff
Everyone looks at the hull. Few check: steering cable boot at transom, throttle/shift cable grommets, fuel fill hose clamps, battery hold-down corrosion, anchor locker drain, navigation light wiring. These sink boats too.
Involve a Second Set of Eyes
My buddy Dave catches things I miss every single year. Trade inspections with a fishing partner. Buy each other lunch. The $20 sandwich saves thousands.
Don’t Ignore the Trailer
Bunk carpet hiding rusted brackets. Rollers frozen solid. Winch strap frayed at the hook. Lights corroded. Tires dry-rotted. A trailer failure at 65 mph on the interstate makes hull damage look cheap.
How It Works for Me: My Post-Storage Inspection Routine
Every March, same weekend. Coffee at 7 AM, boat in the driveway by 7:30. Here’s my actual routine, refined over 15 springs.
First, I pull the cover slow. Not yanking — slow lets me feel if it’s stuck on something (antenna, light, tie-down) and lets the boat “breathe.” I stand back and smell. Musty? Sweet-rot? Gasoline? Each smell tells a story.
Then the walkaround. Counter-clockwise, always. Port bow, port side, transom, starboard side, starboard bow. I’m looking for cover chafe, dents, animal signs, water stains on the ground. I check the trailer tires, bearings, lights before I even touch the boat.
Inside: cushions out, hatches up. Flashlight in mouth (headlamp works too), awl in hand. I start at the transom — motor mount bolts, transom corners, drain plug. Press, probe, wiggle. Move forward: floor around seat bases, battery tray, fuel tank straps. Under gunwales with the mirror — looking for rivet weep, cracks at bench supports.
Outside bottom: on the creeper. Raking light along every chine, every keel section, every strake. Rivet rows get the mirror treatment. I count weeping rivets per section — port chine, starboard chine, keel, bottom panels. More than three per section gets flagged for repair.
Transom gets the moisture meter. Four readings per corner, two at motor mount height, two at midline. Anything over 18% gets noted for core sampling. Under 12% is happy. 12-18% is “watch.”
Photos at every station. Wide context, then tight detail. Voice memo on phone describing what I’m seeing — faster than writing, captures nuance.
Total time: 22 minutes this year. Found two weeping rivets on the port chine (marked blue), one soft spot on port floor near battery tray (awl went 1/4 inch), and a wasp nest in the starboard drain hole. Two hours of repairs Saturday afternoon. Launch day: dry bilge, zero stress.
What I Like About This Systematic Approach
After years of winging it, the systematic approach changed everything. Here’s why I stick with it:
- It’s repeatable: Same sequence, same tools, same documentation every year. No “did I check the transom corners?” doubt.
- It builds a history: My 2019 photos show zero weeping rivets. 2021 shows three. 2023 shows eight. That trend line told me to reseam the chine before it cracked.
- It forces honesty: You can’t “kind of” probe with an awl. It either penetrates or it doesn’t. The data doesn’t lie.
- It catches the invisible: Moisture meter finds rot you’d never feel. Raking light finds cracks you’d never see. The tools extend your senses.
- It’s teaching material: My son (14) comes with me now. He holds the mirror, marks rivets, learns the boat. Next generation gets the knowledge.
The routine became a ritual. Not a chore — a rite of spring. Like tuning a guitar before a gig.
What Could Be Better About Jon Boat Storage Inspections
No system is perfect. Here’s where the current approach falls short and what I’m experimenting with:
- Internal rib corrosion: You can’t see inside the closed hull sections where ribs meet bottom skin. Moisture meter helps but can’t reach deep. Some surveyors use borescopes through rivet holes — I’m testing a 5mm USB scope this year.
- Foam flotation saturation: Coast Guard requires flotation foam. Once it’s waterlogged, it holds moisture against the hull forever. No non-destructive test exists. Cutting test plugs is the only way — but then you have to seal them perfectly.
- Galvanic corrosion from dock neighbors: If you store at a marina, nearby boats’ electrical faults can eat your anodes and hull. A reference electrode test (silver/silver chloride) measures hull potential — but it’s $400 for the tool and requires expertise.
- Trailer-induced stress: Improper bunk placement creates hard spots that fatigue the hull cyclically. No easy way to measure this except strain gauges — wildly impractical. Best defense: proper bunk setup per manufacturer specs.
- Cover system flaws: Most covers trap moisture. Breathable covers help but cost 3x more. Shrink-wrap with vents is better but single-use. I’m testing a custom frame with a breathable cover this year — will report back.
The gap between “good inspection” and “perfect knowledge” is real. But perfect is the enemy of done. My 22-minute routine catches 95% of actionable issues. The last 5% requires invasive testing that isn’t justified without cause.
My Personal Experience: The Season I Almost Lost My Boat
July 2016. Lake Erie, two miles out, 3-foot chop. My 1998 Lowe 1648 — bought used, “solid little boat” — started feeling mushy in turns. Not soft, exactly. Just… vague. Like the hull was flexing differently.
I nursed it back. Pulled the drain plug — water streamed out for four minutes. Not normal bilge water. Hull water.
Next morning, cover off, flashlight out. The port chine had a 14-inch crack running from the third rivet aft of the bow seat to the transom corner. The rivets along the crack were all weeping — white stalactites hanging from each head. The chine had been flexing for years, work-hardening, finally cracking. Storage moisture had wicked in, frozen, expanded, accelerated the crack.
I didn’t have the tools, knowledge, or money for a proper repair. A buddy who welds aluminum said “bring it over.” We drilled crack stops, V-grooved the crack, TIG-welded it, stitch-welded the rivet line, epoxy-primed, bottom-painted. Three days, $400 in materials, countless beers.
That boat ran another six years. I sold it to a kid who still texts me photos of his catches from it.
The lesson wasn’t “weld your own boat.” The lesson was: that crack existed in March. I would’ve seen it with a 20-minute inspection. A $15 tube of 3M 5200 and three rivets in March. Instead: $400, three days, six years of watching that repair like a hawk.
Every spring since, I inspect like my season depends on it. Because it does.
Recommendation: Build Your Own Inspection Habit
Don’t copy my routine exactly. Build yours around your boat, your storage, your skills. But steal these principles:
- Schedule it: Put “Jon Boat Inspection” on the calendar. First Saturday above 50°F. Non-negotiable.
- Kit it: Keep inspection tools in a dedicated box. Grab box, go. No hunting for the awl.
- Document it: Photos + notes + date. Digital folder labeled by year. Future you will thank present you.
- Act on it: Findings demand action. Weeping rivet = sealant this weekend. Soft floor = schedule repair before season. Flagged items don’t survive to next year.
- Review it: Before each season, pull last year’s photos. Compare. That comparison is where the magic lives.
Start this year. Even if your boat is new. Especially if your boat is new — baseline photos are gold.
How to Use Signs of Hull Damage on Jon Boat After Storage Knowledge Effectively
Knowing the signs is step one. Using that knowledge to keep your boat on the water is step two. Here’s the practical workflow:
Immediate Actions (Do This Week)
- Buy the tools if you don’t have them. Flashlight, awl, mirror, moisture meter. $120 total.
- Schedule your inspection weekend. Text your inspection buddy.
- Pull the cover. Just pull it. Look. Smell. That’s data.
Short-Term Projects (This Month)
- Complete the Standard Inspection. Photograph everything.
- Repair all weeping rivets: drill, clean, 3M 5200, solid rivet or bolt with nylock.
- Reseal all through-hulls: pull, clean, butyl tape, reinstall.
- Replace drain plug and gasket. $8. Do it.
- Treat any surface corrosion: wire brush, naval jelly, rinse, epoxy prime, paint.
Season-Long Habits
- After every trip: pull plug, wipe bilge, look at the water. Oil sheen? Rust flakes? Debris?
- Monthly: check transom bolts for wiggle. Torque to spec if loose.
- Pre-tournament/big trip: full walkaround. No exceptions.
Off-Season Prep (The Best Prevention)
- Clean thoroughly — pressure wash inside and out. Salt, fish slime, bait residue hold moisture.
- Dry completely — leave hatches open, cushions out, in sun for two days if possible.
- Block properly — under ribs, not panels. Keel supported. No hard spots.
- Cover breathable — or shrink-wrap with vents. No tarps touching hull.
- Battery out, on tender. Electronics removed. Drain plug OUT.
- Mothballs or dryer sheets in compartments — mice hate them.
The off-season prep is 80% of the battle. A clean, dry, properly blocked, vented boat in storage shows minimal spring damage. A wet, dirty, poorly blocked boat writes its own repair bill.
Signs of Hull Damage on Jon Boat After Storage Alternatives: Other Inspection Methods
The systematic visual/tactile inspection isn’t the only way. Here are alternatives with trade-offs:
Professional Marine Survey
Cost: $300-600 for small boat survey.
Pros: Trained eye, moisture meter, borescope, hull potential test, written report for insurance/resale.
Cons: Expensive annually. Surveyor doesn’t know your boat’s history like you do. Scheduling delays.
Best for: Pre-purchase, post-accident, insurance requirements, boats over 20 years.
Dealer Spring Commissioning
Cost: $150-400 depending on package.
Pros: Done by techs who know your model. Includes motor, trailer, systems. Warranty on work.
Cons: Often cursory hull check — focused on systems. You’re not there to learn. Quality varies wildly.
Best for: Owners with zero mechanical inclination, newer boats under warranty.
DIY with Borescope
Cost: $80-200 for decent 5mm articulated scope.
Pros: Sees inside closed sections, behind transom, in foam cavities. Finds hidden corrosion.
Cons: Learning curve. Limited field of view. Can’t quantify —