
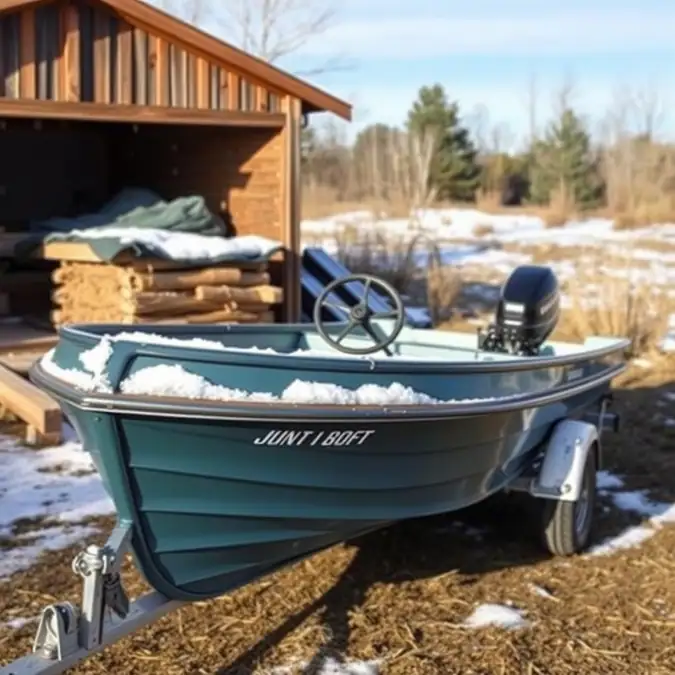
How to Winterize Jon Boat for Storage
I was struggling with my jon boat turning into a science experiment every spring — cracked hoses, corroded wires, and a motor that coughed like it had a three-pack-a-day habit. Then I discovered a proper winterization routine that actually works. If you’ve ever pulled the cover off in April and felt your stomach drop, this guide is for you. I’ve spent fifteen years running aluminum boats on northern lakes, and I’ll walk you through every step so your jon boat wakes up ready to fish, not ready for the scrap heap.
- Proper winterization prevents costly spring repairs — cracked blocks, corroded electronics, and ruined fuel systems cost thousands
- Fuel stabilization is non-negotiable — ethanol gasoline goes bad in 30 days; treat every tank before storage
- Fogging oil protects internal engine components — a $15 can saves a $3,000 powerhead
- Batteries need maintenance charging — a dead battery in spring means a $100+ replacement
- Cover choice matters more than you think — tarps trap moisture; breathable covers prevent mold and mildew
- Trailer maintenance is part of boat winterization — bearings, tires, and lights all need attention before the snow flies
Why Winterize a Jon Boat for Storage

Here’s the thing nobody tells you at the boat ramp: aluminum doesn’t rust, but everything attached to it does. Your jon boat’s hull might survive winter fine, but the motor, wiring, fuel system, and trailer won’t. I learned this the hard way on a 1998 Tracker Grizzly — skipped fogging oil one year because I was rushing to deer camp. Come April, the cylinders had surface rust that cost me a top-end rebuild. Three hundred bucks and a weekend I’ll never get back.
Winterization isn’t about the boat. It’s about the systems that make the boat go. Water expands when it freezes. Ethanol separates and gums up carburetors. Batteries self-discharge and sulfate. Mice chew wiring because it’s warm and smells like soy-based insulation. Every single one of these problems is preventable. None of them fix themselves.
The keyword here is prevention. A proper winterization routine takes four to six hours and costs maybe $100 in supplies. Skip it, and you’re looking at minimum $500 in repairs, often much more. I’ve seen guys drop $2,000 on a new lower unit because they didn’t drain the gear case. That hurts.
Benefits of Winterizing Your Jon Boat

Let me put this in perspective. My buddy Dave winterizes religiously. His 2005 Mercury 40 hp still starts on the second pull every spring. His neighbor Mike “runs it dry and calls it good.” Mike has replaced two carburetors, a fuel pump, and a starter in three years. Dave spends $80 a year on supplies. Mike spends $800 on parts. You do the math.
The benefits stack up fast. First, you protect your investment. A jon boat with motor and trailer runs $8,000 to $25,000. Winterization is cheap insurance. Second, you save time in spring. While your buddies are troubleshooting hard starts and rough idles, you’re catching walleye. Third, you extend equipment life. Engines that get fogged and stabilized last thousands of hours longer. Fourth, you avoid the “spring surprise” — that moment when you turn the key and hear nothing but a click.
There’s also the trailer. Bearings packed with fresh grease don’t seize. Tires stored off the ground don’t flat-spot. Lights cleaned and dielectric-greased don’t corrode. A trailer failure on the highway at 65 mph isn’t just expensive — it’s dangerous. Winterization covers all of it.
Types of Winterization Methods

Not all winterization is created equal. The method you choose depends on your climate, your storage situation, and your engine type. Let me break down the main approaches I’ve seen work — and the ones that don’t.
Full Winterization (Recommended for Freezing Climates)
This is the gold standard. Every system gets addressed: fuel stabilized, engine fogged, gear case drained and refilled, battery removed and maintained, water systems blown out, hull cleaned and waxed, trailer serviced, boat covered with a breathable cover. Takes four to six hours. Costs $80-$150 in supplies. Provides complete protection. This is what I do every year.
Basic Winterization (Mild Climates, Heated Storage)
If you store in a heated garage and temps never drop below 40°F, you can get away with less. Stabilize fuel, fog engine, disconnect battery, cover the boat. Skip the gear case oil change if it’s fresh. Still takes two to three hours. But be honest — if a polar vortex hits and your garage hits 20°F, you’re exposed.
“Run It Dry” Method (Not Recommended)
Some old-timers say just run the tank dry and call it good. This is dangerous advice. Modern ethanol fuel leaves residue even when the tank is “empty.” The carburetor bowls still have fuel. The fuel lines still have fuel. The vapor in the tank condenses into water. I’ve seen this method destroy more engines than any other. Don’t do it.
Professional Winterization Service
Marinas and dealers offer winterization packages, typically $250-$500. They do the work, they warranty it, you show up in spring. Worth it if you’re short on time or mechanical confidence. Just verify what’s included — some “packages” skip fogging or gear case service.
Popular Winterization Approaches

Over the years, I’ve seen patterns in how different boaters handle winter storage. The approach often matches the boat type and the owner’s personality.
The “Do It Once, Do It Right” Crowd
These folks follow the service manual to the letter. Torque specs, specific fluids, exact procedures. They keep logs. Their boats last forever. I’m in this camp. It’s not obsessive — it’s just understanding that shortcuts compound.
The “Good Enough” Group
Stabilize fuel, maybe fog, throw a tarp on it. Works fine until it doesn’t. Usually fine for three to five years, then something expensive breaks. They always say “I’ve done it this way for years” right before the repair bill arrives.
The “Shrink Wrap and Forget” Method
Popular at marinas. Boat gets shrink-wrapped, stored outside. Pros: excellent weather protection, rodent resistant. Cons: traps moisture if not vented properly, expensive ($15-$25 per foot), single-use plastic waste. If you go this route, insist on vents and a zippered access door so you can check on things mid-winter.
Indoor Heated Storage
The Cadillac option. Climate-controlled, secure, easy access. Costs $1,000-$3,000 per season. Makes winterization simpler but doesn’t eliminate it. You still need fuel stabilization, fogging, and battery care. The heat just removes the freezing risk.
How to Choose the Right Winterization Method
Decision time. Here’s my framework — answer these questions and the choice becomes obvious.
What’s Your Lowest Winter Temperature?
If you see sustained temps below 20°F, you need full winterization. No exceptions. Water in the block, gear case, or livewell will freeze and crack something. If you’re in the South and it rarely freezes, basic winterization works. But climate is changing — plan for the worst winter in ten years, not the average.
Where Are You Storing the Boat?
Heated garage? Basic plus battery maintenance. Unheated pole barn? Full winterization plus rodent protection. Outside under shrink wrap? Full winterization plus vents and mid-winter checks. Outside under a tarp? Don’t. Just don’t. Tarps trap moisture and shred in wind.
What Engine Do You Have?
Two-stroke outboards need more fogging oil — they rely on fuel for lubrication. Four-strokes need crankcase oil change before storage. Direct-injection two-strokes (ETEC, OptiMax) have specific dealer procedures. Inboards and I/Os need closed cooling system antifreeze. Read your manual. Seriously. Read it.
How Much Time and Skill Do You Have?
Four hours and basic tools? Do it yourself. Zero time or zero confidence? Pay a pro. There’s no shame in hiring expertise. The shame is in skipping it entirely.
Step-by-Step Winterization Guide
This is the meat. Follow these steps in order. Don’t skip. Don’t rearrange. Each step builds on the last.
Step 1: Gather Your Supplies
Before you start, get everything staged. Here’s my checklist:
- Fuel stabilizer (Sta-Bil 360 Marine or Star Tron Enzyme — 1 oz per 10 gallons)
- Fogging oil (CRC Engine Stor or Mercury Storage Seal)
- Gear case oil (Quicksilver High Performance or equivalent — two quarts)
- Gear case pump or squeeze bottle
- Lower unit drain/fill washers (two new ones — they’re $0.50 each)
- Four-stroke oil and filter (if applicable)
- Battery charger/maintainer (NOCO Genius or Battery Tender)
- Dielectric grease
- Marine grease (for trailer bearings)
- Bearing packer or grease gun
- Breathable boat cover (Carver, Covercraft, or custom)
- Moisture absorbers (DampRid or silica gel buckets)
- Rodent deterrent (Fresh Cab pouches or dryer sheets — yes, dryer sheets work)
- Shop towels, nitrile gloves, drain pan, funnel
Total cost: roughly $120-$180 depending on what you already own. Everything’s available at marine stores, auto parts stores, or online.
Step 2: Clean the Boat Thoroughly
Start with a clean slate. Wash the hull with boat soap — not dish soap, which strips wax. Clean the deck, seats, and compartments. Vacuum every crumb. Mice smell forgotten sandwich crusts from fifty yards. Remove all electronics, life jackets, ropes, tackle — anything that holds moisture or attracts critters. Leave compartments open to air dry for a day if possible.
Wax the hull while you’re at it. A good coat of Carnauba or synthetic wax protects the gel coat or aluminum from oxidation and makes spring cleanup easier. I use Collinite 885 — lasts all season and then some.
Step 3: Fuel System — Stabilize and Run
Fill the tank 95% full. This minimizes air space and condensation. Add stabilizer at the recommended rate. Run the engine for 10-15 minutes at idle to pull treated fuel through the entire system — lines, pump, carbs or injectors. If you have a portable tank, treat it too and run the engine on it.
Critical point: ethanol fuel absorbs water. A full tank has less air, less condensation, less water absorption. Stabilizer prevents phase separation for up to 24 months. Untreated fuel goes bad in 30 days. This step alone saves more engines than anything else.
Step 4: Fog the Engine
With the engine running at fast idle (1,000-1,500 RPM), spray fogging oil into the air intake until the engine smokes heavily and stalls. For carbureted engines, spray into each carb throat. For EFI, follow manufacturer procedure — some have a fogging port, some need spray through the throttle body. Two-strokes: fog until it dies. Four-strokes: fog, then pull plugs and spray into each cylinder, bump starter to coat walls, reinstall plugs.
Fogging oil coats cylinders, pistons, rings, and valves with a protective film that prevents rust. It’s the single most important step for engine longevity. A can costs $12. A powerhead costs $3,000. You decide.
Step 5: Change Gear Case Oil
Drain the lower unit. Look at the oil — milky means water intrusion (bad seals), metal flakes mean bearing wear (worse), black and smelly means it’s overdue (normal). Refill with fresh oil through the bottom hole until it weeps from the top vent. Replace both drain washers. Torque to spec (usually 8-10 ft-lbs).
Why bottom-fill? Air pockets. Top-filling traps air. Bottom-filling pushes air out. It’s the only way to get a full fill. Takes five minutes. Do it every year.
Step 6: Four-Stroke Crankcase Oil Change
If you have a four-stroke, change the oil and filter now. Warm engine drains better. Acidic old oil sitting in the crankcase all winter etches bearings. Fresh oil protects. Use marine-rated FC-W oil — automotive oil lacks rust inhibitors for marine environments. Filter too. Always the filter.
Step 7: Battery Care
Remove the battery. Clean terminals with a wire brush and baking soda solution. Charge fully with a smart charger. Store in a cool (not freezing), dry place — concrete floor is fine, that’s a myth. Connect a maintainer (not a trickle charger — maintainers monitor and cycle). Check monthly. A maintained battery lasts 5-7 years. A neglected one lasts two.
If you must leave it in the boat, disconnect the negative cable, clean terminals, coat with dielectric grease, and connect a maintainer through a pigtail. But removing it is better.
Step 8: Water Systems and Livewells
Blow out all lines with compressed air. Run the bilge pump dry. Remove the livewell pump and drain it. If you have a freshwater system, run pink RV antifreeze through it — not automotive antifreeze. The pink stuff is propylene glycol, non-toxic. Automotive is ethylene glycol, deadly to pets and wildlife.
Step 9: Trailer Maintenance
Jack up the trailer. Spin wheels — feel for roughness. Pull hubs, clean bearings, inspect races. Replace if scored. Repack with marine grease (blue or red, not white lithium). Reinstall with new seals. Torque castle nut to spec, back off 1/4 turn, cotter pin. Check tire pressure — inflate to max sidewall rating. Block tires off ground if possible. Test all lights. Coat connections with dielectric grease.
Trailer failures cause more accidents than boat failures. Don’t skip this.
Step 10: Cover and Secure
Use a breathable cover. Not a tarp. Tarps trap moisture against the hull, creating a greenhouse for mold and mildew. Breathable covers (Sunbrella, Top Gun, WeatherMax) let vapor escape while shedding water. Support the cover with a pole or frame so water doesn’t pool. Pooling water stretches fabric, tears seams, and weighs down the boat.
Place moisture absorbers inside — two for a 16-footer, four for a 20-footer. Toss in rodent deterrent. Close all vents except one small one for airflow. Lock the trailer coupler. Take a photo of the setup for reference.
Engine and Fuel System Care
The engine is the heart of your jon boat. Treat it like one. Beyond the basic steps above, there are nuances that separate “runs okay” from “runs like new.”
Carbureted vs. Fuel Injected
Carbureted engines have float bowls that hold fuel. Even with stabilized fuel, these can gum up. After fogging, I like to drain the float bowls via the drain screws. Takes two minutes. Fuel injected systems don’t have bowls, but the injectors can still clog. Stabilizer prevents this. Run the engine long enough to circulate treated fuel through the rails.
Two-Stroke Specifics
Oil injection systems: don’t drain the oil tank. The oil doesn’t go bad. But do fog heavily — two-strokes have no oil film on cylinder walls once the fuel evaporates. Pre-mix guys: same fogging procedure. Direct injection (ETEC, OptiMax): these have specific winterization modes in the computer. Use the dealer software or follow the manual exactly. Don’t improvise.
Four-Stroke Specifics
Valve train matters. Fogging coats the valves, but changing the oil removes acids. Check valve clearances if you’re at the service interval (usually 200-300 hours). It’s easier now than in spring rush. Also, pull the spark plugs and inspect. Replace if worn. Gap new ones. A fresh set of plugs is $20 and guarantees easy starting.
Propeller and Shaft
Pull the prop. Inspect the hub — rubber hubs degrade. Grease the prop shaft heavily with marine grease. Check the prop for nicks and cracks. A damaged prop vibrates, destroys bearings, and wastes fuel. Send it to a prop shop now; they’re slow in winter, fast in spring. Reinstall prop with a new cotter pin.
Electrical and Battery Maintenance
Electrical gremlins are the number one spring headache. Corrosion is the enemy. Prevention is easy.
Battery Deep Dive
Lead-acid batteries (flooded, AGM, gel) all self-discharge. A flooded battery loses 5% per month. AGM loses 3%. At 50% charge, sulfation begins — permanent capacity loss. At 20%, the battery may never recover. A smart maintainer holds at 100% without overcharging. It’s the best $40 you’ll spend.
Lithium (LiFePO4) batteries are different. Store at 50-60% charge. Disconnect completely. No maintainer needed. They lose 2-3% per month. Check in March. If you have lithium, you already know this — but I’ll say it anyway: don’t use a lead-acid charger on lithium.
Wiring and Connections
Every connection is a corrosion site. Disconnect every plug you can reach. Spray with CRC Marine Electrical Contact Cleaner. Coat with dielectric grease. Reconnect. Focus on: battery terminals, engine plug, trim/tilt plug, navigation light plugs, bilge pump connections, fish finder power. If it plugs in, treat it.
Inspect the wiring harness for chafe points. Zip-tie anything rubbing. Mice love chewing wires — the soy-based insulation is a snack. Wrap vulnerable runs in corrugated loom or conduit. Those Fresh Cab pouches I mentioned? They smell like balsam fir to us, predator urine to mice. Place them near wiring entry points.
Electronics Removal
Take your fish finder, GPS, and radio head unit home. Cold doesn’t hurt them, but condensation does. The display seals fail over time. A warm house is better than a damp boat. Store in original boxes if you have them. Label the cables with masking tape — “bow graph power,” “console transducer” — saves headaches in April.
Hull and Trailer Protection
The hull and trailer carry you all season. Give them respect.
Aluminum Hull Care
Aluminum oxidizes — that dull gray film. It’s not rust, but it looks bad and pits over time. Wash with aluminum cleaner (Star brite or Sharkhide), rinse, dry, then wax. Yes, wax aluminum. It works. I use a random orbital polisher with a foam pad — makes quick work of a 16-footer. If you have rivets leaking, mark them with a Sharpie for spring repair. Don’t try to fix in 30°F garage temps.
Fiberglass Hull Care
Wash, compound if oxidized, wax. Check for stress cracks around the transom, keel, and lifting strakes. Spider cracks are cosmetic. Cracks you can catch a fingernail on need repair. Mark them. Photograph them. Gel coat repair is a spring project.
Trailer Frame
Inspect the frame for rust. Wire brush, prime, paint any bare metal. Check the winch strap — frayed? Replace. Winch gears — grease them. Bunks or rollers — carpet worn? Replace. Roller brackets bent? Straighten or replace. A bunk carpet costs $40. A scratched hull costs hundreds.
Tires and Bearings
I covered bearings in the step-by-step, but let me emphasize: trailer tires age out before they wear out. Check the DOT date code (last four digits = week/year). Over five years? Replace. Even if tread looks good. Sidewall cracking? Replace. A blowout at highway speed with a boat behind you is a life-changing event. Not the good kind.
Interior and Accessories Storage
Everything comes out. Everything.
Seats and Cushions
Remove all cushions. Wash with mild soap, rinse thoroughly, dry completely — I mean bone dry. Store indoors in a climate-controlled space. Stack with towels between to prevent imprinting. If you must leave them, prop them up on edge for airflow, and use moisture absorbers. But really, take them home. Mice nest in foam. I’ve pulled entire families out of seat bases in April.
Electronics and Gauges
Cover gauge faces with plastic wrap or press-and-seal if leaving in dash. Better: remove the whole panel if it’s accessible. Spray connections with dielectric grease. Store gauges in a padded case. Transducers: if through-hull, leave it. If transom-mount, remove and store. The cable is the weak point — don’t kink it.
Safety Gear
Life jackets: wash, dry, store indoors. CO2 inflators: check charge indicator. Fire extinguisher: check gauge, shake upside down to loosen powder. Flares: check expiration. First aid kit: replenish used items. Throw bag: repack neatly. Registration and docs: take photos, store originals in a ziplock at home.
Anchors, Ropes, Fenders
Rinse anchor and chain. Dry. Oil the chain lightly. Coil ropes properly — figure-eight coils prevent kinks. Fenders: deflate slightly, store flat. Dock lines: inspect for chafe, replace if fuzzy. A $30 line fails at the worst moment. Don’t ask how I know.
Covering and Securing the Boat
The cover is your boat’s winter coat. Get it right.
Cover Types Ranked
- Custom-fit breathable cover — Best protection, best fit, best ventilation. $300-$800. Lasts 7-10 years.
- Semi-custom breathable cover — Good fit, good ventilation. $150-$300. Lasts 5-7 years.
- Universal breathable cover — Okay fit, needs extra tie-downs. $80-$150. Lasts 3-5 years.
- Shrink wrap — Excellent weather protection, zero ventilation unless vented. $15-$25/foot per year. Single use.
- Blue tarp — Terrible. Traps moisture, shreds in wind, degrades in UV. $20. Lasts one winter if you’re lucky.
I use a Carver custom cover on my 1872. Fourth season, looks new. Worth every penny.
Support System
Water pooling destroys covers and stresses the boat. Use a cover support system: adjustable poles with padded tips, or a PVC frame. Peak the cover so water runs off. Minimum 12″ clearance at center. Tie down every strap — wind gets under loose covers and turns them into sails. I’ve seen covers ripped off and boats damaged by the flailing fabric.
Ventilation
Even breathable covers need help. Leave one transom vent cracked. Use cover vents (snap-in plastic vents) if your cover has them. Air movement prevents the “rain inside the cover” effect from condensation. Two vents minimum — one forward, one aft — creates cross-flow.
Security
Lock the coupler with a hitch lock. Chain the trailer to a tree or post if outside. Remove the wheels if you’re really paranoid (I do). Take a photo of the VIN plate and registration. Trailers get stolen. Boats on trailers get stolen. It happens.
Tips for Effective Winterization
These are the little things that make a big difference. Learned over years of trial, error, and watching others learn the hard way.
- Label everything. Masking tape and Sharpie. “Port carb drain,” “Starboard trim wire,” “Bilge pump fuse.” Spring brain is real.
- Take photos. Battery wiring, fuel line routing, cover strap configuration. Your phone is your best service manual.
- Check mid-winter. After the first big snow, peek under the cover. Check for water pooling, rodent tracks, cover damage. Fix issues before they compound.
- Keep a log. Notebook in the boat bag. Date, hours, what you did, what you noticed. “11/15/24 — 247 hrs. Fogged, stabilized, gear oil changed. Noticed prop nick on leading edge. Order new prop.” Priceless in spring.
- Don’t forget the kill switch lanyard. Remove it. Store with keys. The clip corrodes if left on.
- Trim the motor down. All the way. This drains the exhaust housing completely. Trimmed up traps water.
- Open the drain plug. Store it in the glove box or a ziplock taped to the transom. A boat full of rainwater is a tragedy.
- Fuel valve off. If you have a selector valve, turn it to OFF. One less leak path.
How It Works for Me
Every November, same ritual. Saturday morning, coffee thermos, classic rock on the shop speaker. Boat on the trailer in the driveway. I start with the wash — it’s the mental transition from fishing season to maintenance season. By noon, the fuel’s treated and the engine’s fogged. Afternoon is gear case oil, battery, trailer bearings. Evening is cover, moisture absorbers, final walkaround.
Sunday I check the maintainer lights. Green across the board. Monday I peek under the cover — dry, tight, secure. Done. Spring comes, I charge the battery, reinstall electronics, check fluids, prime the fuel bulb, and she fires on the second pull. Every. Single. Year.
The routine works because it’s systematic. No “did I do that?” moments. No “I’ll get to it later.” Later never comes. The calendar says November, the work gets done.
What I Like
What I like about this process is the peace of mind. In January, when it’s -10°F and the wind’s howling, I don’t wonder about my boat. I know it’s protected. I like that spring commissioning takes an hour, not a weekend. I like that my 20-year-old motor starts like new. I like that I’ve never had a cracked block, a corroded connector, or a mouse nest in the cowling.
I like that the cost is predictable. $120 a year, every year. No $800 surprises. No “well, since it’s apart anyway” scope creep. I like that I can do it all myself with basic tools. And I like that when my fishing buddies are cursing their hard-starting engines on opening weekend, I’m already on the water.
What Could Be Better
Honestly? The time. Six hours is a chunk of a weekend. If you work Saturdays, it’s tough. The solution is splitting it — fuel and engine Saturday, trailer and cover Sunday. Or hiring a mobile marine tech. They come to you. Costs $200-$300 but saves your weekend.
Also, the waste. Used oil, used gear lube, old filters, shrink wrap plastic. I recycle everything — auto parts stores take oil, marinas take filters, but it’s still a hassle. Biodegradable two-stroke oil helps. So does a reusable cover instead of shrink wrap.
And the physical part. Crawling under the trailer, reaching under the cowling, wrestling the cover.