
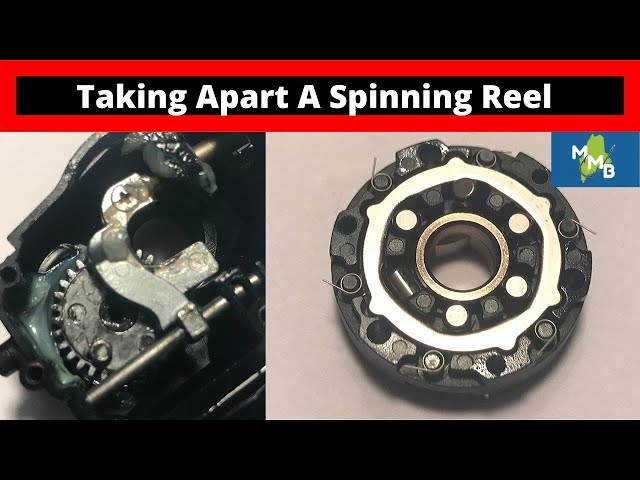
How to Take Apart a Spinning Reel: Complete Step-by-Step Guide
If your fishing is suffering from poor casting performance, line tangles, or a sticky retrieve, learning how to take apart a spinning reel can restore its smooth operation. This guide walks you through the safe, correct method for disassembling a typical spinning reel for cleaning and maintenance. Whether your reel is stiff, noisy, or just hasn’t been serviced in years, proper disassembly is the first step toward reliable performance on the water.
Estimated Time: 30 to 60 minutes
Difficulty Level: Beginner to Intermediate
Preparation: Basic tool familiarity and clean workspace
What You’ll Need Before You Start
| Tool or Supply | Purpose |
|---|---|
| Screwdriver (Phillips and flathead) | Removing screws and prying components |
| Small container or tray | Keeping small parts organized |
| Clean rags or paper towels | Wiping dirt and debris |
| Fishing reel grease or light oil | Lubricating moving parts |
| Soft brush (old toothbrush works) | Cleaning crevices and gears |
| Flashlight or phone light | Inspecting internal components |
Before you begin, work on a clean, well-lit surface. Have a small container ready to hold screws and tiny parts so nothing gets lost. Wear safety glasses if you have them, as small springs or pins can sometimes pop out unexpectedly.
Step-by-Step Guide to Disassembling Your Spinning Reel
Step 1: Remove the Reel Cap and Spool
Start by removing the end cap from the spool. On most spinning reels, this is a bolt-on or twist-off cap located at the spool end opposite the handle. Unscrew or pop it off carefully. Next, slide the spool out of the reel body. Some spools require pressing a release button or loosening a retaining screw—check your reel’s manual if the spool won’t come out easily.
Check: Spool should come out smoothly once the cap is removed. If it feels stuck, double-check that all fasteners are fully removed.
Step 2: Remove the Handle and Lock Button
The handle typically attaches via a bolt or press-fit design. Use the appropriate screwdriver to remove the handle bolt, then pull the handle straight off. The lock button on the side may pop out when the handle is removed, or it may need to be gently pried out with a flathead screwdriver. Place all removed parts in your container.
Note: Take a photo of the handle assembly before removal if you’re unsure how it fits back together.
Step 3: Access the Main Body Screws
With the handle and spool removed, you’ll see the main body screws. These usually number three to five and are located around the face of the reel. Use your screwdriver to remove them systematically, keeping track of which screw came from which position. Set them aside in your container.
Check: After all screws are out, the side plates should separate easily.
Step 4: Separate the Reel Body
Once all screws are removed, gently pry the two side plates apart. Start one corner and work around the perimeter. Be careful not to force it—if resistance is strong, look for hidden screws or clips. As the plates separate, you’ll see the internal gear train, drag system, and bail mechanism.
Warning: The bail spring may release with force. Keep your fingers clear of moving parts.
Step 5: Remove the Bail Assembly
The bail is the curved wire that guides line during casting. It’s usually held in place by a small pin or screw. Remove this fastener carefully. Once free, the bail assembly will come out. Some anglers choose to leave the bail together during cleaning, but removing it completely allows thorough access to the bail guide and pivot points.
Tip: Do not fully disassemble the bail itself unless you’re experienced. The internal spring is difficult to reassemble correctly.
Step 6: Extract the Gear Train
With the bail removed, you can now access the main gears. The drive gear (connected to the spool) and the pinion gear (driving the handle) should be visible. These may be held in place by small retaining clips or simply sit in machined grooves. Gently lift the gear train out as a single unit if possible.
Check: Inspect gears for roughness, pitting, or excessive wear. Dark or gummy residue indicates need for thorough cleaning.
Step 7: Clean All Components
Now comes the cleaning phase. Use your soft brush to remove dirt, sand, and old grease from all surfaces. Pay special attention to gear teeth, the spool shaft, and the bail pivot. Wipe everything dry with a clean rag. For stubborn grime, a few drops of mild solvent like mineral spirits can help, but avoid harsh chemicals that might damage seals or plastics.
Note: Take your time here. A thorough cleaning prevents future stiffness and extends reel life significantly.
Reassembly and Final Steps
Step 8: Lubricate Moving Parts
Before reassembly, apply a light coat of fishing reel grease or oil to all moving surfaces. Focus on gear teeth, the spool shaft, and the bail pivot. Avoid over-lubricating—excess grease attracts dirt and can gum up the mechanism. A few drops of oil on the handle shaft and lock button threads is sufficient.
Check: Moving parts should feel smooth but not slick when dry.
Step 9: Reassemble in Reverse Order
Begin by placing the gear train back into position, ensuring all gears mesh correctly. Reattach the bail assembly and reinstall any pins or screws. Carefully align the side plates and reinstall the main body screws, tightening them evenly. Finally, reinstall the handle and spool, then add the end cap.
Check: Handle should turn smoothly without binding. Spool should rotate freely with minimal resistance.
Step 10: Test Function Before Field Use
Grip the spool and turn the handle several times. The spool should rotate smoothly without wobble. Test the bail by opening and closing it several times—it should operate without catching. If everything moves freely and quietly, your reel is ready for the water.
Final Check: Cast a few practice lines to verify smooth operation under load. Adjust drag tension if needed.
Common Mistakes and Troubleshooting
Problem: Reel Feels Stiff After Reassembly
Likely Cause: Over-tightened screws or excess lubricant.
Check: Ensure side plate screws are snug but not over-tightened.
Solution: Remove screws, clean excess grease, and reassemble with proper torque.
Problem: Handle Won’t Stay Attached
Likely Cause: Loose or missing handle bolt.
Check: Verify the handle bolt is fully threaded and tightened.
Solution: If threads are stripped, the handle assembly may need professional replacement.
Problem: Line Tangles After Reassembly
Likely Cause: Misaligned spool or uneven drag.
Check: Spool should sit level in the frame; drag should apply even pressure.
Solution: Remove spool, check alignment, and adjust drag washers per manufacturer specs.
Problem: Bail Won’t Close Properly
Likely Cause: Misaligned bail or damaged pivot point.
Check: Bail should sit level and pivot smoothly.
Solution: Recheck bail positioning and ensure pivot pin is fully seated.
When to Stop and Seek Professional Help
Stop and consult a qualified repair technician if:
- You encounter stripped threads, broken parts, or missing components
- The drag system fails to engage or holds inconsistently
- You discover corrosion inside the reel body that won’t respond to cleaning
- Multiple reassembly attempts result in the same problems
Attempting to repair complex issues beyond basic maintenance can void warranties and may cause more harm than good. When in doubt, professional servicing is always the safest choice.
Frequently Asked Questions
How often should I take apart my spinning reel?
For recreational use, annual disassembly and cleaning is recommended. Heavy use in saltwater or sandy conditions may require more frequent maintenance. Tournament anglers often service reels after every major outing.
Can I use regular motor oil instead of fishing reel grease?
Avoid motor oil as it can break down under temperature changes and attract dirt. Use specifically designed fishing reel lubricants or a light machine oil like 3-in-1 oil for general maintenance.
Why is my fishing reel stuck and won’t turn?
A stuck reel usually indicates seized bearings, packed-in dirt, or collapsed drag washers. Disassembly and cleaning are typically required. If the problem persists after cleaning, internal components may need replacement.
How do I remove the spool from my spinning reel?
Most spools slide out once the end cap is removed. Some require pressing a release button or loosening a small screw near the spool flange. Refer to your reel’s manual for specific instructions.
What’s the difference between cleaning and servicing a reel?
Cleaning involves removing dirt and reapplying lubricant. Full servicing includes inspecting all components for wear, replacing worn parts, adjusting drag systems, and performing precision maintenance on bearings and gears.
Can I take apart a baitcasting reel the same way?
Baitcasting reels share similar basic principles but have additional complexity in the drag system and gear alignment. Refer to specific baitcasting reel guides for detailed instructions.
Final Thoughts
Learning how to take apart a spinning reel gives you control over one of your most important fishing tools. Regular maintenance prevents costly repairs and ensures reliable performance when it matters most. With patience and attention to detail, any angler can restore smooth operation to a neglected reel and extend its useful life significantly.
Once your reel is properly assembled and tested, you’re ready to get back on the water with confidence. Remember—cleanliness and consistent lubrication are the keys to long-term reel reliability.