
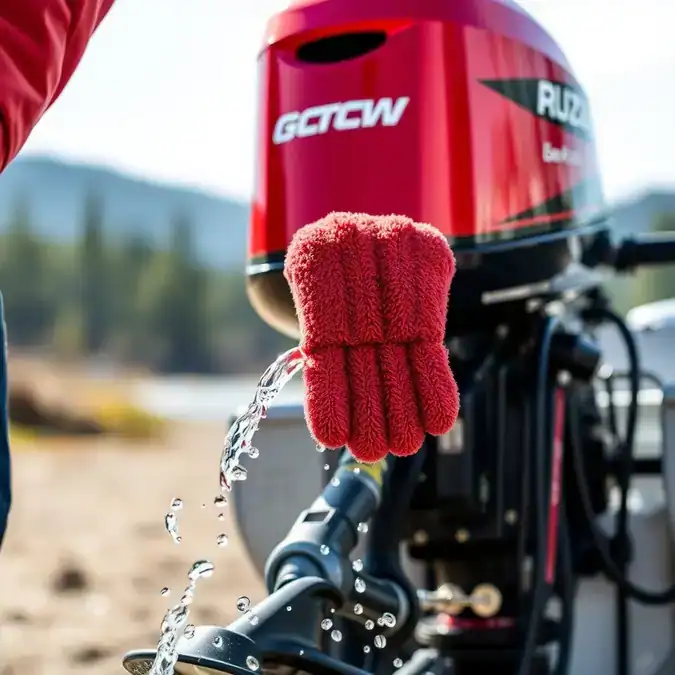
How to Flush Outboard Engine with Muffs
I was struggling with salt buildup killing my outboard after every saltwater trip. Then I discovered how to flush outboard engine with muffs and it changed everything — my motor runs cleaner, starts faster, and I’m not replacing impellers every season. If you boat in salt, brackish, or even silty freshwater, flushing isn’t optional — it’s the difference between a motor that lasts 20 years and one that dies at five. I’ll walk you through every step, every tool, every mistake I’ve made so you don’t have to.
- Flush every saltwater trip — salt crystals eat aluminum from the inside out
- Use muffs that seal tight — rectangular cups beat round ones on most modern motors
- Run the engine at idle only — never rev while flushing; you’ll burn the impeller
- Watch the tell-tale — steady stream means flow; sputter means air leak or clog
- Five to ten minutes — that’s all it takes; longer wastes water and time
- Built-in flush ports work — but only for quick rinses; muffs do a deeper clean
- Store muffs dry and flat — cracked rubber seals leak and ruin the flush
Why Flush Your Outboard at All

Salt water is basically corrosion soup. Every time you run in salt, brackish, or even mineral-heavy freshwater, you’re pumping dissolved solids through passages the width of a pencil lead. When the engine cools, that water evaporates and leaves behind crystals — sharp, expanding crystals that pit aluminum, score cylinder walls, and clog thermostats. I’ve seen a three-year-old 150 HP powerhead eaten alive because the owner “rinsed the outside” and called it good. The outside doesn’t matter. The inside does.
Flushing pushes fresh water through the same path salt water took, dissolving those crystals before they harden. It also clears sand, silt, and the occasional zebra mussel larva. Most manufacturers — Yamaha, Mercury, Suzuki, Honda — specify flushing in the owner’s manual. Skip it and you void warranty coverage on corrosion claims. I learned that the hard way on a 2017 Yamaha F115. Dealer denied the claim. $4,200 lesson.
What Are Flush Muffs and How They Work

Flush muffs — some call them “ear muffs” or “flush cups” — are rubber cups on a metal or plastic yoke that clamp over your outboard’s lower unit water intakes. You connect a garden hose, turn on the water, start the engine, and the impeller pulls fresh water through the cooling system just like it does underway. Simple. Effective. Cheap.
The key is the seal. If the cups don’t hug the intake grates tight, the impeller sucks air instead of water. Air cavitates. Impeller burns. Overheat alarm screams. You’re buying a new impeller kit and maybe a housing. Good muffs have flexible rubber cups, a spring-loaded or adjustable yoke, and a standard 3/4-inch garden hose fitting. Some swivel. Some have quick-connect fittings. The best ones feel like a tool, not a toy.
Types of Flush Muffs: Which One Fits Your Motor

Not every muff fits every motor. Here’s the breakdown:
Rectangular Cups (Most Modern Outboards)
Yamaha, Mercury, Suzuki, Honda — most 2000-and-newer motors have rectangular intake grates. Rectangular cups seal flat and wide. They’re the standard now. I run Seachoice 18301 on my Yamaha F115 and Attwood 9379-7 on a buddy’s Mercury 250. Both seal first try.
Round Cups (Older Motors, Some Small Engines)
Pre-2000 Johnsons, Evinrudes, some Tohatsus, and many 2.5–20 HP portables have round intakes. Round cups work fine there. Don’t force rectangular cups on round intakes — they’ll leak at the corners.
Dual-Feed / Heavy-Duty Yokes
Big V6 and V8 motors (250 HP+) pull serious water volume. Single-feed muffs can starve them at idle. Dual-feed yokes run two hoses or a Y-splitter. If you’re flushing a 300+ HP motor, spend the extra $15. Your impeller will thank you.
Quick-Connect vs. Threaded Hose Fitting
Threaded is bulletproof. Quick-connect is faster but can pop off under pressure. I use threaded on my permanent dock hose; quick-connect on the portable kit in the truck.
Tools and Supplies You’ll Need

- Flush muffs matched to your lower unit (see above)
- Garden hose — 25 ft minimum, 5/8″ ID for flow
- Hose shutoff valve at the muff (saves running to the spigot)
- Bucket — to catch runoff if you’re on a lift or trailer
- Flashlight — to verify water exiting the tell-tale
- Impeller puller and spare impeller — just in case
- Marine grease — for the muff yoke threads and hose threads
That’s it. $40–$70 total if you’re starting from zero. Cheapest insurance on a $15,000 motor.
Step-by-Step: How to Flush Outboard Engine with Muffs
This works on a trailer, a lift, or a dock. Same steps every time.
1. Position the Motor
Trim the motor all the way down — vertical. The lower unit must be submerged in the water flow from the muffs. If you’re on a trailer, the prop should be at least 6 inches off the ground so exhaust clears. On a lift, lower until the anti-ventilation plate is 12–18 inches below the waterline you’d have underway.
2. Attach the Muffs
Slide the cups over the intake grates on both sides of the gearcase. Center them. Wiggle — they should grip the leading edge of the grate, not just sit on the face. Tighten the yoke until the cups compress slightly. You’ll feel resistance. That’s the seal forming.
3. Connect the Hose
Thread the garden hose onto the muff fitting. Hand-tight plus a quarter turn with pliers — don’t strip the plastic. Open the spigot fully. Water should spill from the cups around the grates. That’s good — means pressure is there.
4. Start the Engine
Neutral. Kill switch attached. Start the motor. Let it idle. Do not touch the throttle. Idle only. The impeller is designed to pull at idle RPM. Revving creates vacuum that collapses the muff cups and burns the impeller.
5. Verify Flow
Look at the tell-tale (the little stream out the side or back of the motor). Steady, strong stream = good. Sputtering = air leak. Nothing = shut down immediately. Check the muffs — they’ve likely popped a corner. Reseat and retry.
6. Flush for 5–10 Minutes
Five minutes for freshwater rinse. Ten if you were in salt, brackish, or silty water. Set a timer. Walk away. Check once at the 3-minute mark — tell-tale still flowing? Muffs still seated? Good.
7. Shut Down Correctly
Turn off the engine first. Then shut off the water. This order matters. If you kill water first, the impeller runs dry for the few seconds until the engine stops. That’s how you score the housing.
8. Remove and Store
Pull the muffs off. Shake water out. Lay flat in a dry bin. Don’t toss them in a wet locker where the rubber rots or the spring rusts.
Common Mistakes That Damage Your Motor
I’ve made all of these. Learn from my wallet.
Revving the Engine
Number one killer. “Just a little blip to clear it.” No. The impeller isn’t a pump — it’s a flexible vane wheel that relies on water for lubrication. No water = instant heat = melted vanes. I’ve melted two. $85 each plus labor.
Running Without Verifying Tell-Tale Flow
You assume it’s working. It’s not. Three minutes later, overheat alarm. Warped head. $1,200. Always watch the tell-tale for the first 30 seconds.
Using the Wrong Muffs
Round cups on rectangular intakes. Rectangular on round. Universal “fits all” cheapies that seal on nothing. Buy the right shape. One time.
Flushing in Gear
Some folks put it in gear “to spin the prop and pump better.” The prop bites air, the shaft spins unloaded, the dog clutch chatters, and you’re rebuilding the lower unit. Neutral only. Ever.
Leaving the Hose On After Shutdown
Water backs up through the exhaust, into the cylinders, hydraulic locks the motor. Bent rods. Total loss. Engine off, then water off. Every time.
Skipping the Flush “Because It Was Just One Trip”
One salt trip leaves enough crystals to start pitting. Do it every time. No exceptions.
How Often Should You Flush
| Water Type | Flush Frequency | Duration |
|---|---|---|
| Saltwater / Brackish | Every single use | 10 minutes |
| Silty / Muddy Freshwater | Every single use | 5–7 minutes |
| Clean Freshwater | Every 3–5 uses | 5 minutes |
| Extended Storage (any water) | Before storage + fogging | 10 minutes + fog |
If you boat daily in salt, flush daily. If you’re a weekend warrior, flush Sunday evening. Make it the last thing you do before the cover goes on.
Flush Muff Alternatives: Built-In Ports, Bags, and More
Muffs aren’t the only way. Here’s what else works — and when to use each.
Built-In Flush Port (Most 2005+ Motors)
Threaded port on the side of the lower unit or mid-section. Connect hose, turn on water, do not start engine. Water flows backward through the cooling passages by mains pressure alone. Good for a quick 2-minute rinse after a freshwater trip. Not a substitute for muffs — doesn’t exercise the impeller, doesn’t clear the thermostat housing as well, and can’t verify impeller health. I use the port for quick rinses; muffs for the real weekly flush.
Flush Bag / Flush Tank
Collapsible vinyl bag that wraps the lower unit. Fill with hose, start engine. Works on motors with hard-to-reach intakes (some jet drives, some high-performance gearcases). Bulky. Slow to fill. Good for lifts where muffs won’t seal. I keep one for my buddy’s jet outboard.
Flush Adapter for Prop Exhaust (Racing / Performance)
Threads into the prop shaft exhaust hub. Flushes through the exhaust path. Niche. Only for motors that exhaust through the prop and have no lower unit intakes. Not for typical recreational outboards.
DIY Bucket Method (Emergency Only)
Submerge lower unit in a 5-gallon bucket, run hose into bucket, start engine. Bucket drains fast — you’re constantly refilling. Impeller can cavitate if level drops. Works in a pinch at a remote cabin. Not for routine use.
Pro Tips for Long-Term Motor Health
- Fog after the last flush of the season. Run the motor, spray fogging oil into each cylinder through the spark plug holes, then pull the plugs and spray again. Prevents cylinder rust.
- Replace the impeller every 2 years or 200 hours. Whichever comes first. Rubber hardens. Vanes crack. A $35 impeller prevents a $2,000 powerhead.
- Check the thermostat annually. Pop the housing, drop the stat in a pot of water with a thermometer. Opens at rated temp? Good. Stuck closed? Replace. Stuck open? Runs cold, burns fuel, carbons up.
- Use a fuel stabilizer every fill. Ethanol attracts water. Water + aluminum = corrosion. Stabilizer keeps fuel fresh 12+ months.
- Grease the prop shaft every haul-out. Prevents the prop from fusing to the shaft. Also lets you inspect the seal.
- Keep a flush log. Sharpie on the motor cover: date, water type, duration. Sounds nerdy. Saves arguments with dealers.
Troubleshooting: No Water Flow, Leaks, Overheating
No Tell-Tale Stream
- Shut down immediately.
- Check muff seal — reseat cups.
- Check hose pressure — kink? shutoff valve closed?
- Pull the tell-tale fitting (usually a push-fit or small bolt). Clear with monofilament line.
- Still nothing? Impeller may be shredded. Pull lower unit, inspect.
Muffs Leak at the Cups
- Reposition — cups must cover the entire grate, not half.
- Clean the grate — barnacles, paint flakes, zinc anode debris break the seal.
- Try a different brand — cup profiles vary.
- If your motor has a “speedo pickup” hole near the grate, some muffs have a third small cup for it. Use it.
Overheat Alarm at Idle
- Shut down.
- Verify tell-tale flow — if weak, see above.
- Check thermostat — stuck closed is common after salt exposure.
- Check poppet valve / pressure relief — stuck closed builds pressure, blocks flow.
- Water pump housing scored? Impeller eaten? Rebuild kit time.
My Personal Experience: What Works and What Doesn’t
I’ve flushed probably 500 times across four motors — a 1998 Johnson 90, a 2008 Mercury 115, a 2017 Yamaha F115, and my current 2022 Suzuki DF140. Here’s the honest truth.
What I Like
Rectangular muffs on modern four-strokes just work. The Seachoice 18301 has survived six seasons, two moves, and a dropped-off-the-lift incident. The rubber hasn’t cracked. The spring still clamps. The hose fitting hasn’t stripped. Ten minutes, walk away, done. My Suzuki’s tell-tale runs like a garden hose at idle — best flow I’ve seen.
Built-in flush port is great for “I’m tired and it’s Tuesday” rinses. Thread, turn, walk away. No engine noise. Neighbors don’t hate you.
What Could Be Better
Cheap universal muffs are garbage. I bought a $12 “fits all” pair at a big-box store. Round cups on rectangular grates. Leaked like a sieve. Impeller screamed. I threw them in the trash after one use. Spend $25 on the right shape.
Quick-connect hose fittings on muffs fail. The plastic clips get brittle in UV. One popped at 40 psi, sprayed my face, and the motor ran dry for 15 seconds. I replaced all mine with brass threaded fittings. Zero issues since.
Flush bags take forever to fill. Ten minutes with a 5/8″ hose just to get the bag full. Then you start the motor. Total time: 20 minutes. Muffs take 30 seconds to connect.
My Personal Recommendation
If you have a modern rectangular-intake four-stroke (Yamaha, Mercury, Suzuki, Honda 2005+), get the Seachoice 18301 rectangular flush muffs with a brass hose fitting. Add a Dramm 12353 shutoff valve at the muff. Keep a spare impeller and puller in the boat. Flush every salt trip, 10 minutes, idle only. That’s the system. It costs $60 once and saves thousands.
Quick Comparison Table
| Feature | Seachoice 18301 | Attwood 9379-7 | Generic Universal |
|---|---|---|---|
| Cup Shape | Rectangular | Rectangular | Round + Rectangular (compromise) |
| Seal Quality | Excellent | Very Good | Poor |
| Yoke Material | Steel, powder-coated | Aluminum | Plastic |
| Hose Fitting | Threaded (replaceable) | Quick-connect | Quick-connect |
| Durability (seasons) | 5+ | 3–4 | 1 |
| Price Range | $25–$30 | $22–$28 | $10–$15 |
| Best For | Daily saltwater use | Weekend boaters | Emergency only |
FAQs
Can I flush my outboard without starting the engine?
Yes — use the built-in flush port. Connect hose, turn on water, run 2–3 minutes. Engine off. This rinses passages but doesn’t test the impeller or clear the thermostat housing as thoroughly as muffs with the engine running.
How long should I flush my outboard with muffs?
Five minutes for freshwater, ten minutes for saltwater or brackish. Set a timer. Longer wastes water and doesn’t clean better.
Do I need to flush after every freshwater trip?
Clean freshwater — every 3–5 trips. Silty, muddy, or mineral-heavy freshwater — every trip. Salt or brackish — every trip, no exceptions.
Can I use flush muffs on a jet outboard?
Most jet outboards (Mercury Jet, Yamaha Jet) don’t have lower unit intakes — they pull through the jet intake. You need a flush bag or the manufacturer’s specific flush adapter. Standard muffs won’t work.
What happens if I rev the engine while flushing?
The impeller creates vacuum that collapses the muff cups, starves the pump, and melts the impeller vanes in seconds. Overheat alarm follows. Warped head possible. Never rev while flushing.
Should I flush before or after fogging for winter storage?
Flush first with muffs (10 minutes), shut down, then fog through the spark plug holes while cranking. Flush removes salt; fog coats cylinders. Order matters.
Can I leave the flush muffs on the motor while trailering?
No. Vibration loosens the seal. Cups fall off. Rubber degrades from UV and road grime. Remove and store dry after every flush.
My tell-tale is weak but the motor doesn’t overheat. Is that okay?
No. Weak tell-tale means restricted flow — clogged tell-tale fitting, failing impeller, or stuck thermostat. Fix it before it becomes an overheat at wide-open throttle offshore.
Conclusion
Flushing your outboard with muffs isn’t glamorous. It’s not the shiny upgrade you show off at the ramp. But it’s the single highest-ROI habit you can build — ten minutes, a $25 tool, and you turn a motor that dies at 800 hours into one that hits 3,000. I’ve seen both. The difference is literally just the flush. So next time you pull the boat, before the cover goes on, before the beer opens, hook up the muffs. Start the motor. Watch that tell-tale run strong. Your future self — and your wallet — will thank you. Now grab your muffs and go flush. The water’s waiting.