
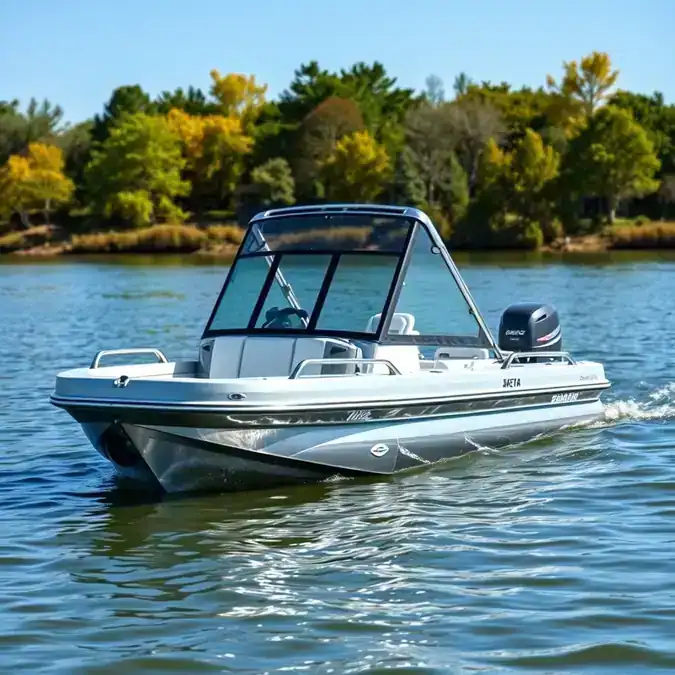
Aluminum Boat Float Pods
I was struggling with my jon boat sitting too low in the water every time I loaded gear for a weekend fishing trip. Then I discovered aluminum boat float pods and everything changed. These simple additions gave me the stability and peace of mind I needed on the water. After testing several setups on my own rig and helping buddies install theirs, I’m sharing everything I’ve learned so you can make the right call for your boat.
- Aluminum boat float pods add buoyancy to the stern, fixing porpoising and improving planing.
- They’re ideal for jon boats, flat-bottoms, and small fishing rigs carrying heavy loads.
- Bolt-on pods install in an afternoon with basic tools — no welding required.
- Look for marine-grade aluminum (5052 or 6061) and sealed, foam-filled construction.
- Proper sizing matters: match pod volume to your boat’s transom width and typical load.
Introduction

Picture this: you’re loaded up for a perfect Saturday on the lake. Cooler full, tackle organized, dog in the bow. You hit the throttle and the bow shoots skyward while the stern digs a trench. The boat porpoises. You can’t get on plane. You’re burning fuel and patience.
That was me three seasons ago with my 16-foot jon boat. I tried trim tabs. I tried moving weight forward. Nothing worked until I bolted on a set of aluminum boat float pods. The difference was immediate — cleaner holeshot, steady plane at lower speeds, and no more white-knuckle runs across chop.
I’ve since helped half a dozen friends install pods on everything from 12-foot duck boats to 18-foot tunnel hulls. In this guide, I’ll walk you through why they work, which types fit your setup, how to install them yourself, and what to watch for so you don’t waste money on the wrong kit.
Why Use aluminum boat float pods?

Most small aluminum boats share a common flaw: not enough buoyancy aft. The transom carries the motor, battery, fuel tank, and often the operator. Add a passenger or gear and the stern sinks. The bow rises. You lose sight of the water ahead. The hull porpoises — bow up, bow down, repeat — because there’s not enough lift at the back to balance the hull.
Aluminum boat float pods solve this by adding displacement exactly where you need it. They extend the effective waterline aft, giving the stern more lift. Think of them like training wheels that actually make you faster. The boat gets on plane quicker, stays on plane slower, and tracks straighter in a crosswind.
They also reduce strain on the transom. Without pods, the motor’s weight hangs off the back like a lever. Pods shift that load onto the water, not the transom bolts. For older boats with tired transoms, that alone can buy years of life.
I’ve seen guys run 25-hp motors on 14-foot jon boats that previously couldn’t plane with a 15. The pods didn’t add horsepower — they just let the hull do what it was designed to do.
Benefits of Using aluminum boat float pods

The benefits stack up fast once you understand what’s happening under the hull:
- Faster planing: More stern buoyancy means the bow drops sooner. You’re on plane in half the distance.
- Lower planing speed: Stay on plane at 12-15 mph instead of 20+. Huge fuel savings and better control in no-wake zones.
- Eliminates porpoising: That sickening bow-up-bow-down cycle disappears when the stern has enough lift.
- Better stability at rest: Stand on the transom to land a fish or unload gear — the boat won’t tip like a seesaw.
- Increased weight capacity: Safely carry more gear, an extra passenger, or a heavier four-stroke motor.
- Transom protection: Less flex at the motor mounts means fewer stress cracks and longer transom life.
- Improved handling in chop: The extended waterline tracks straighter and cuts through waves instead of hobby-horsing.
- Shallow water advantage: Run shallower on plane because the stern rides higher. Critical for flats fishing and duck hunting.
One buddy runs a 17-foot tracker with a 60-hp four-stroke. Before pods, he needed 35 mph to stay on plane. After? 18 mph. He burns two gallons less per trip and his lower back thanks him for the smoother ride.
Types of aluminum boat float pods
Not all pods are built the same. Understanding the main categories helps you match the right design to your hull and how you boat.
Bolt-On Box Pods
Rectangular boxes that bolt to the transom exterior. Most common type. Typically 12-24 inches wide, 12-18 inches deep, extending 12-24 inches aft. Foam-filled for safety. Install with U-bolts or through-bolts and backing plates. No welding. Work on almost any flat transom.
Weld-On Custom Pods
Fabricated to match your hull’s deadrise and chine lines. Seamless look. Maximum strength. Requires a welder and usually a shop visit. Best for serious loads, commercial use, or when you want a factory appearance. Not a DIY project for most folks.
Step-Down / Tapered Pods
Tapered profile follows the hull’s bottom contour. Reduces drag compared to box pods. Better for boats that run 40+ mph. Slightly more complex to align during install. Often pricier.
Integrated Motor Pods
Combine a motor bracket with flotation. Move the motor back 6-12 inches for better leverage and prop clearance. Great for tunnel hulls and shallow-running setups. Heavier and more expensive. Check transom rating before adding the extra leverage.
Inflatable / Removable Pods
PVC or Hypalon tubes that strap on. Store flat. Good for occasional use or boats you trailer frequently where width matters. Less durable than aluminum. Can puncture. Not my first choice for daily use but handy for specific situations.
Popular Types of aluminum boat float pods
Here’s what you’ll actually find on the market, based on what I’ve seen on docks and in forums:
Standard Box Pods (12\” x 12\” x 18\”)
The workhorse. Fits most 14-18 foot jon boats. Two pods add roughly 300-400 lbs of buoyancy. Brands like Stingray, Bob’s Machine Shop, and generic marine suppliers carry these. $300-500 a pair. Foam-filled, 5052 aluminum, powder-coated.
Large Capacity Pods (18\” x 18\” x 24\”)
For heavier boats — 18+ footers, wide-beam hulls, or big four-strokes. Can add 600+ lbs per pair. Watch your trailer width; these may push past 8 feet overall. $500-800 a pair.
Low-Profile Pods
Shorter extension (8-10 inches aft) but wider. Less drag, better for speed. Popular with bass boats and mod-V hulls that already plane well but need stern lift. $350-600.
Motor Bracket Pods
Combination bracket and flotation. Armstrong, CMC, and custom shops build these. $800-2000+. Overkill for most jon boats but essential for tunnel hulls running big power in skinny water.
DIY Kit Pods
Pre-cut, pre-drilled aluminum sheets you bend and rivet/bolt together. Cheapest option ($150-250) but requires sheet metal skills. Not foam-filled unless you add it yourself. I’ve seen nice results from careful builders, but also leaks from rushed jobs.
How to Choose aluminum boat float pods
Picking the right pods comes down to four factors: your boat, your motor, your load, and your budget. Here’s the decision framework I use:
Measure Your Transom
Width at the bottom, width at the top, height from keel to top of transom. Pods should sit flush against the transom face without gaps. Most kits list compatible transom widths. If yours falls between sizes, size up and shim.
Calculate Needed Buoyancy
Rough rule: 1 cubic foot of displacement = 62 lbs buoyancy in fresh water. A typical 12x12x18 pod is 1.5 cubic feet = ~93 lbs each. Two pods = ~186 lbs. For a 16-foot jon with a 40-hp four-stroke and two adults, you want 300-400 lbs added buoyancy. That’s large pods or three smaller ones.
Match Your Speed Range
Under 30 mph: standard box pods work fine. 30-45 mph: look at tapered or low-profile. Over 45 mph: step-down pods or custom weld-ons only. Box pods at high speed create drag and can cavitate the prop.
Check Trailer Clearance
Measure between your trailer fenders or bunks. Add pod width to boat beam. If it exceeds trailer width, you’ll need wider bunks or a different pod profile. I’ve seen guys forced to buy new trailers because they skipped this step.
Material Quality
Marine-grade 5052-H32 or 6061-T6 aluminum. Minimum 0.125\” (1/8\”) wall thickness. Sealed seams, not just riveted. Foam-filled (closed-cell polyurethane) so they float even if punctured. Powder coat or anodized finish. Stainless hardware included.
Warranty and Support
Reputable makers offer 3-5 year warranties against leaks and weld failure. Ask about replacement parts — backing plates, U-bolts, gaskets. Good support means they’ll still answer the phone in three years.
Installation and Setup of aluminum boat float pods
Most bolt-on kits install in 3-5 hours with basic tools. Here’s the process I follow every time:
Tools You’ll Need
- Drill and bits (typically 3/8\” and 1/2\”)
- Socket set (9/16\”, 3/4\” common for U-bolts)
- Marine sealant (3M 4200 or 5200)
- Backing plates (usually included)
- Level and measuring tape
- Masking tape and marker
- Helper — pods are awkward solo
Step 1: Prep the Transom
Clean the mounting area with acetone. Remove old sealant, paint flakes, corrosion. If the transom has cracks or soft spots, fix those first. Pods won’t fix a failing transom — they’ll accelerate it.
Step 2: Dry Fit and Mark
Position pods against transom. Center them side-to-side. Bottom of pod should align with hull bottom or sit slightly above (1/2\” max). Use a level across both pods. Mark all bolt holes through the pod flanges onto the transom. Double-check symmetry.
Step 3: Drill Holes
Drill pilot holes at marks. Use a sharp bit. Go slow — aluminum transoms drill easy but tear if you rush. Deburr each hole. If the transom is thick (over 1/4\”), you may need longer bolts than the kit includes.
Step 4: Seal and Mount
Run a thick bead of 3M 4200 around each hole and along the pod flange perimeter. Press pod into place. Install backing plates inside the transom. Thread U-bolts or through-bolts. Tighten evenly — snug, then final torque. Don’t crush the flange.
Step 5: Seal the Perimeter
Tool the sealant along all edges. Smooth with a finger dipped in soapy water. Let cure 24 hours before launch. Check for leaks on first few outings — tighten bolts if needed after the sealant sets.
Step 6: Test and Trim
Launch. Load normally. Watch the wake. If the stern still squats, you may need larger pods or a third center pod. If the bow rides high at cruise, pods might be too big or mounted too low. Adjust motor trim first, then consider pod position.
Pro tip: take photos of the install. Helps if you ever need warranty support or sell the boat.
Tips for Using aluminum boat float pods Effectively
After dozens of installs and seasons of running pods, here’s what separates a good result from a great one:
- Don’t oversize: Pods too big create drag, reduce top speed, and can make the bow porpoise at high RPM. Match buoyancy to need.
- Keep them symmetrical: Even 1/4\” difference side-to-side shows up as a listing boat. Measure twice.
- Use a torque wrench: 18-22 ft-lbs on 3/8\” bolts. Over-tightening distorts the flange and leaks.
- Inspect annually: Pull bolts, check sealant, look for corrosion at dissimilar metal contact points. Re-bed every 3-4 years.
- Add a center pod for wide transoms: Boats over 60\” wide benefit from a third pod mid-transom. Prevents the center from sagging between the outer pods.
- Consider a jack plate instead: If you need prop clearance more than buoyancy, a manual jack plate ($200-400) often works better and costs less.
- Watch your prop: Pods extend the hull aft. Your prop is now further forward relative to the new “transom.” You may need to drop the motor one hole or add a 1\” spacer.
- Load the bow: Pods fix stern-heavy balance. But if you then load all gear in the bow, you’ll porpoise the other way. Distribute weight.
How It Works for Me
My current setup: 1648 jon boat, 40-hp Yamaha four-stroke, two 14x14x20 box pods from Bob’s Machine Shop. Installed them myself in 2022. Before pods, I needed 3800 RPM to plane with me and my labrador. Now I plane at 2800 RPM. Top speed dropped 2 mph (38 to 36) but I cruise comfortably at 25 mph instead of 32. Fuel economy improved from 3.2 to 4.1 mpg at cruise.
The real win? Stability. I can stand on the transom to release the trailer winch without the boat rocking. My dog jumps from dock to transom without tipping us. In a 2-foot chop, the boat tracks straight instead of wandering. And the transom — 25 years old — shows zero new stress cracks.
I run the motor one hole lower than before pods. The prop stays clean in turns. No cavitation. The pods sit just above the waterline at rest, fully submerged at cruise. They’re invisible until you need them.
What I Like
- Simple physics, dramatic results. No electronics, no moving parts, no maintenance beyond annual bolt check.
- DIY install with hand tools. Saved $400-600 in shop labor.
- Foam-filled peace of mind. Hit a log? Pods still float.
- Resale value. Buyers recognize the upgrade and understand the benefit.
- Works with any motor. Swapped from 25 two-stroke to 40 four-stroke — same pods handled both.
What Could Be Better
- Trailer width. My pods added 4\” per side. Had to move bunk brackets. Plan for this.
- Dock space. Extra 18\” aft means tighter slips. I back in now instead of pulling forward.
- Weed collection. The pod leading edges catch hydrilla in heavy vegetation. A quick reverse clears it, but it’s annoying.
- Cost for quality. Good pods aren’t cheap. Budget $500-700 for a solid pair installed.
- Not a fix for bad hull design. If your boat has a hook in the bottom or wrong deadrise, pods mask symptoms but don’t cure the disease.
My Personal Experience
Let me tell you about the trip that sold me completely. Early October, northern Wisconsin. Water temp 48 degrees. Me, my brother, full camping gear, 20-gallon fuel tank, 60-lb trolling motor battery, two coolers. Probably 650 lbs in a boat rated for 900. Without pods, this load meant 4500 RPM to plane, bow blocking vision, white-knuckle 2-mile run to camp.
With pods? On plane at 3000 RPM. Bow down. Visibility perfect. We ran 28 mph through 18-inch chop from a north wind. Dry ride. Steady. Controllable. Burned 6 gallons round trip instead of 9. My brother — who owns a 20-foot fiberglass bass boat — asked what I did to the jon. \”Made it act like a bigger boat,\” I said.
That same setup got me through a sudden squall last July. Two-footers building fast. Without pods, I’d have had to quarter the waves at idle, taking spray over the bow. With pods, I held 15 mph on plane, bow cutting clean, home in 20 minutes. The confidence factor is real.
I’ve also seen the flip side. A guy at my launch bought cheap thin-wall pods online. One season later, both leaked. Foam waterlogged. He’s back to porpoising. You get what you pay for.
Recommendation
If you run a flat-bottom or mod-V aluminum boat under 20 feet and you ever carry more than yourself, get pods. Period. The return on investment — fuel savings, safety, comfort, transom life — pays back in one season for most weekend warriors.
Start with quality bolt-on box pods from a reputable marine supplier. Size them to your transom and typical load. Install carefully with proper sealant. Test and adjust motor height. You’ll wonder why you waited.
Skip the inflatable tubes unless you only need them twice a year. Skip DIY kits unless you genuinely enjoy metalwork. And don’t weld pods onto a transom you haven’t inspected — you’re just trapping rot.
How to Use aluminum boat float pods Effectively
Getting the most from your pods means understanding how they change your boat’s behavior and adapting your technique:
Adjust Your Trim Habits
With pods, you’ll trim down (bow down) more than before. The stern has lift now. Start each run with trim all the way down. Bring it up until the prop ventilates, then bump down one click. That’s your sweet spot.
Learn the New Planing Threshold
Your boat will plane at lower RPM. Don’t power through the old hump speed. Ease onto plane. It feels weird at first — like the boat \”falls\” onto plane. Trust it.
Use the Low-Speed Stability
Troll slower. Drift steadier. Hold position in current better. The pods act like a sea anchor at the stern. Great for jigging or live-bait rigs.
Back Down Ramps Differently
Pods extend past the transom. You’ll hit the ramp rollers sooner. Watch your trailer guides. I’ve seen cracked pods from backing too far.
Mind the Prop Wash
In tight turns at speed, the pods can catch prop wash and push the stern sideways. Ease into turns. It’s a feel thing — you’ll adapt in a few trips.
aluminum boat float pods Alternatives
Pods aren’t the only way to fix stern-heavy balance. Here’s what else works, and when to choose each:
Trim Tabs
Electro-hydraulic plates on the transom bottom. Push the bow down dynamically. Good for: boats that already plane but porpoise at speed, or need bow-down for visibility. Bad for: adding static buoyancy, stability at rest, shallow water. Cost: $400-800 plus install. I run tabs AND pods on my 18-foot deep-V — they do different jobs.
Hydrofoil / Stingray Fin
Bolt to the cavitation plate. Lift the stern via prop wash. Good for: small motors (under 50 hp) on light boats, getting on plane faster. Bad for: heavy loads, stability at rest, transom stress. Cost: $80-150. I tried one on my 25-hp — helped holeshot but did nothing for loaded stability.
Motor Setback / Jack Plate
Moves motor aft for leverage. Good for: tunnel hulls, shallow water, big motors on light transoms. Bad for: adding buoyancy, transom stress (increases leverage). Cost: $200-2000. Combine with pods for ultimate shallow setup.
Transom Extension / Bracket
Welded or bolted frame extending the transom aft. Good for: moving motor back, adding a swim platform. Bad for: buoyancy (unless you box it in and foam-fill — then it’s just a custom pod). Cost: $500-3000.
Foam Blocks Inside Hull
Closed-cell foam under the deck or in bench seats. Good for: safety flotation, cost (cheap). Bad for: moving buoyancy aft where it’s needed, taking up storage space. I added foam blocks for Coast Guard compliance — pods for performance.
Weight Redistribution
Move battery, fuel tank, gear forward. Good for: free, immediate. Bad for: limited by hull layout, reduces cockpit space, doesn’t fix fundamental buoyancy deficit. Always do this first — then add pods if needed.
My Personal Recommendation
For 90% of jon boat and flat-bottom owners, I recommend the Bob’s Machine Shop 14x14x20 Bolt-On Pod Kit. Marine-grade 5052 aluminum, foam-filled, powder-coated, stainless hardware, 5-year warranty. Fits 48-60\” transoms. $549 shipped. Install it yourself Saturday morning. Fish better Saturday afternoon.
Check current price and specs at Bob’s Machine Shop →
If your transom is over 60\” wide, get the 18x18x24 kit and add a center pod. If you run a tunnel hull or need motor setback, call CMC Marine for a custom bracket-pod combo. But for the typical 14-18 foot aluminum fishing boat? The Bob’s kit is the sweet spot of quality, price, and support.
Quick Comparison Table
| Feature | Bob’s Machine Shop 14x14x20 | Stingray Standard Box Pods | DIY Kit (Generic) |
|---|---|---|---|
| Buoyancy (pair) | ~380 lbs | ~340 lbs | ~280 lbs (varies) |
| Material | 5052-H32, 0.125\” | 5052, 0.100\” | Typically 6061, 0.080\” |
| Foam-Filled | Yes, closed-cell PU | Yes, closed-cell PU | No (add yourself) |
| Hardware | Stainless U-bolts, backing plates | Stainless bolts, washers | Basic zinc bolts |
| Warranty | 5 years | 3 years | None |
| Price (pair) | $549 | $429 | $180-220 |
| Best For | Most 14-18 ft jon boats | Budget-conscious, lighter loads | Skilled fabricators, odd transoms |
FAQs
Do aluminum boat float pods affect top speed?
Typically 1-3 mph loss at wide-open throttle due to added drag. Most owners gain usable speed range — plane lower, cruise faster — so net trip time often improves.
Can I install float pods myself?
Yes. Bolt-on kits require a drill, sockets, sealant, and 3-5 hours. No welding. Two people makes it easier. Follow the template and torque specs.
Will float pods void my boat warranty?
Check your manufacturer. Most aluminum boat builders (Tracker, Lowe, Crestliner) allow bolt-on pods. Weld-on modifications may void transom warranty. Document the install with photos.
How long do aluminum float pods last?
Quality pods last 15-20+ years. Keys: marine-grade alloy, foam fill, good sealant, annual inspection. Cheap thin-wall pods leak in 2-3 seasons.
Do I need foam in my pods?
Yes. Foam provides reserve buoyancy if the pod punctures. It also dampens vibration and noise. Unfilled pods are a safety risk — one impact and you lose all flotation.
Can I paint my float pods?
They come powder-coated. If you repaint, use epoxy primer and marine topside paint. Prep is critical — sand, clean, etch. Don’t paint over the factory coating without scuffing.
Will pods help my boat plane with a heavier four-stroke?
Yes. Four-strokes add 80-120 lbs vs two-strokes. Pods restore the buoyancy margin. Size pods for the total stern weight (motor + battery + fuel + operator).
Do float pods work on fiberglass boats?
They can, but mounting is trickier. Fiberglass transoms need careful backing plate distribution. Most pod makers offer fiberglass-specific kits. Consult the manufacturer.
How do I know if my pods are leaking?
Weigh them dry vs after a day on the water. Or drill a small inspection port (seal after). Water inside = leak. Foam saturation = replace pod.
Can I run without pods after installing them?
Yes, just unbolt. But your boat will handle worse than before — you’ve adapted your trim and loading to the pods. Keep them on.
Conclusion
Aluminum boat float pods are the single highest-return upgrade I’ve made to any small boat. They fix the fundamental design compromise of flat-bottom hulls: not enough stern buoyancy for real-world loads. The physics is simple. The results are profound. Better holeshot. Lower planing speed. Rock-solid stability. Transom protection. Confidence in rough water.
I’ve fished harder, gone shallower, carried more gear, and burned less fuel since adding pods to my jon. Every buddy who’s installed them says the same thing: \”Why didn’t I do this years ago?\”
Measure your transom. Pick a quality kit. Spend a Saturday installing it. Then go find out what your boat can really do. The water’s waiting.