
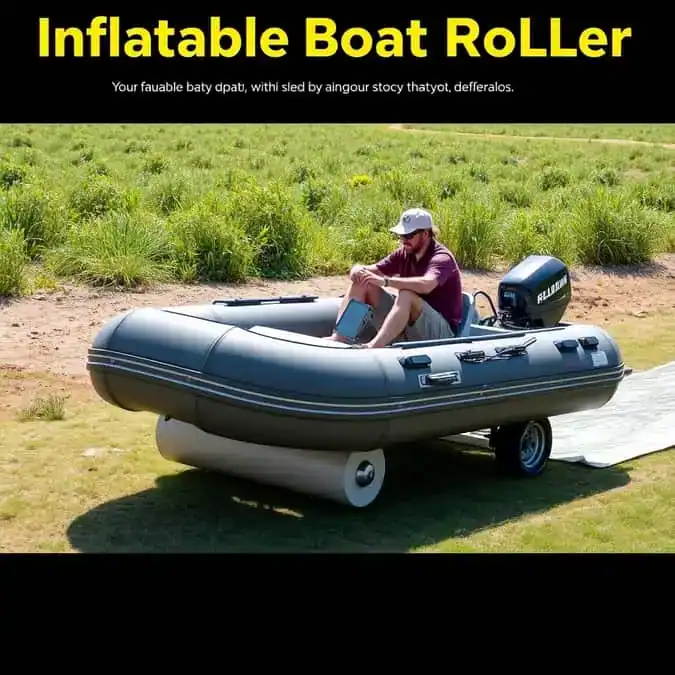
Inflatable Boat Roller
I was struggling with dragging my heavy inflatable dinghy across rocky shorelines every weekend, watching the hull scrape against jagged edges and wondering how much longer it would hold air. Then I discovered an inflatable boat roller system that changed everything — no more backbreaking lifts, no more gouged tubes, just smooth rolling from truck to water. In this guide, I’ll walk you through everything I’ve learned about choosing, installing, and using these game-changing accessories so you can protect your investment and save your back.
- Inflatable boat roller systems eliminate heavy lifting and protect your hull from abrasion during launch and retrieval
- Choose between transom-mounted, trailer-mounted, and portable roller styles based on your boat size and launch conditions
- Key selection factors include weight capacity, roller material (PVC vs. rubber), mounting hardware quality, and adjustability
- Proper installation takes 30-60 minutes with basic tools — measure twice, drill once
- Regular maintenance (rinse, inspect, lubricate) extends roller life 3-5 years in saltwater environments
Introduction

Last summer I watched a guy at the ramp wrestle a 12-foot Zodiac by himself — red face, strained back, tubes scraping over barnacle-encrusted concrete. I used to be that guy. Then I bolted a set of heavy-duty rollers to my trailer and another pair to the transom. The difference was night and day. One person can now launch or load in under five minutes, even on steep, slick ramps. This article covers every angle: why rollers matter, which type fits your setup, how to install them without drilling regret, and the small habits that keep them spinning freely for seasons. Whether you run a 9-foot tender or a 16-foot RIB, you’ll walk away knowing exactly what to buy and how to use it.
Why Use Inflatable Boat Roller?

An inflatable boat roller solves the single biggest headache of small-boat ownership: moving a heavy, flexible, slippery tube from point A to point B without destroying it or your spine. Without rollers, every launch becomes a friction fight. The hull drags over gravel, concrete, sand, and submerged debris. Each scrape thins the PVC or Hypalon, invites leaks, and shortens the boat’s life. I’ve patched enough abrasion holes to know the math — a $150 roller kit pays for itself the first time it prevents a $300 tube repair.
Beyond protection, rollers change the physics of the job. A 150-pound RIB on bare bunks needs two strong adults or a winch. The same boat on quality rollers glides with one hand. That means solo launching becomes realistic, not just a YouTube fantasy. For anglers hitting remote put-ins before dawn, for families with kids and gear, for anyone who values independence on the water — rollers aren’t a luxury. They’re the difference between “I’ll go tomorrow” and “I’m on the water now.”
Benefits of Using Inflatable Boat Roller

The benefits stack up fast once you’ve used them a few times. First, hull protection. Rollers distribute weight across wide, smooth surfaces instead of concentrating pressure on bunk edges. No more wear strips peeling off after a season. Second, solo capability. I launch my 14-foot Achilles solo in three minutes flat — back down, unhook, push, done. Third, ramp versatility. Steep, short, or algae-slick ramps that defeat bunk trailers become manageable because rollers keep rolling where bunks stick.
Fourth, speed. Loading takes half the time. No winching, no repositioning, no “hold on, let me adjust the strap.” Fifth, resale value. A boat with pristine tubes commands premium money. Buyers notice clean bottoms. Sixth, peace of mind. You stop wincing at every crunch and scrape. That mental freedom lets you focus on fishing, diving, or just enjoying the ride. Seventh, reduced wear on your vehicle. Less winching means less strain on your truck’s electrical system and your own shoulders. The list goes on, but those seven cover the practical reality for most owners.
Types of Inflatable Boat Roller

Three main categories dominate the market, each built for a specific mounting point and use case. Transom-mounted rollers clamp or bolt to the stern, guiding the boat’s aft end during the critical transition from trailer to water. They’re essential for solo loading because they catch the boat before it can slide sideways. Trailer-mounted rollers replace or supplement traditional bunks. Full roller trailer conversions exist, but most owners add roller kits to existing bunk trailers — cheaper and reversible. Portable rollers stand alone. Think freestanding A-frames or wheeled dollies you position by hand. Great for beach launches, bad for steep ramps where the boat can run away.
Within each category, materials vary. PVC rollers cost less, resist UV decently, but can develop flat spots under constant load. Rubber rollers (usually EPDM or neoprene) cost more, grip better wet or dry, and hold their shape longer. Stainless steel brackets and shafts resist corrosion; zinc-plated hardware rusts within a season in saltwater. Bearing types matter too — sealed ball bearings spin freest and longest, bronze bushings tolerate neglect better, plain plastic sleeves are budget-only. Match the type to your launch style: transom + trailer rollers for ramp users, portable for beach/cove hoppers, all three if you do everything.
Popular Types of Inflatable Boat Roller
Walk any boat ramp and you’ll see the same few designs repeating because they work. The V-block transom roller — two angled rollers forming a cradle — centers the boat automatically as you push. Brands like CE Smith and Yates lead here. Keel rollers sit centerline, supporting the inflatable’s floor or rigid keel strip. They prevent the “banana bend” when weight concentrates midship. Side rollers mount vertically on trailer bunks, guiding the tubes laterally. Wobble rollers (wide, crowned rollers on articulated arms) conform to tube shape and self-center — popular on full roller trailers. Spools or pipe rollers are simple PVC tubes over a shaft; cheap, replaceable, but less grip when wet.
For portable setups, the folding A-frame with pneumatic tires dominates. You unfold, position, load, then fold and stow. The Harbor Freight “boat mover” dolly gets mentioned often — budget-friendly but bearings need grease before first use. Inflatable-specific roller kits from companies like Inflatables.net bundle transom clamps, keel roller, and side guides in one box. Convenient, but check weight ratings against your actual loaded boat weight (engine, fuel, gear, anchor, cooler — it adds up fast). Whatever type you pick, prioritize sealed bearings and stainless hardware. The $40 savings on zinc-plated kits disappears the first time you replace seized rollers.
How to Choose Inflatable Boat Roller
Start with your boat’s loaded weight — not the catalog dry weight. Weigh it at a truck scale if unsure. Add 20% safety margin. That’s your minimum roller capacity. Next, measure transom width and tube diameter. Clamp-on transom rollers adjust, but only within a range. Too narrow and they pinch; too wide and the boat wobbles. Check your trailer’s bunk spacing and frame width for side/keel roller kits. Some kits only fit 2-inch bunks; others need 3-inch. Roller diameter matters: 3-inch rollers handle heavier loads with less deformation than 2-inch. Material: rubber for grip and longevity, PVC for budget and freshwater-only use.
Mounting style: bolt-through beats clamp-on for permanent setups — no slippage under load. But clamp-on lets you test position before drilling. Adjustability: look for slotted holes or sliding brackets so you can fine-tune roller contact points after the first few launches. Corrosion resistance: stainless steel (316 grade ideal) for brackets, shafts, and fasteners. Bearings: sealed ball bearings if you launch weekly; bronze bushings if monthly. Warranty: 1-year minimum, 3-year on premium brands. Reviews: filter for your boat type and launch conditions. A 5-star review from a freshwater kayak angler means little for a saltwater RIB owner. Finally, buy from a retailer with easy returns — fitment surprises happen.
Installation and Setup of Inflatable Boat Roller
Block out an hour, gather basic tools: drill, bits (3/16″, 1/4″, 5/16″), wrenches (7/16″, 1/2″, 9/16″), marine sealant, tape measure, marker, level. Read the instructions first — sounds obvious, but half the botched installs I’ve seen skipped this step. Start with the boat on the trailer, centered, at launch-ready height. Position transom rollers so they contact the tube just below the rub rail when the boat sits level. Mark clamp or bolt positions. If bolting, drill pilot holes, coat bolts with sealant, torque to spec (usually 15-20 ft-lbs for 1/4″ stainless). If clamping, tighten evenly — alternate sides like lug nuts.
For trailer rollers, remove old bunk carpet if present. Mount keel roller centerline first — use a string line from bow eye to transom center. Side rollers next: position so they kiss the tubes at mid-height when loaded. Check alignment by rolling the boat back and forth a foot. Adjust until it tracks straight without binding. Tighten all fasteners. Apply anti-seize to threads. Lubricate bearings with marine grease. Test launch: back down slowly, watch roller contact. Note any rub marks — those need adjustment. First three launches are your shakedown. Carry tools for on-the-ramp tweaks. Pro tip: photograph the final setup for future reference or resale.
Tips for Using Inflatable Boat Roller Effectively
Keep rollers clean. Sand and salt act like grinding paste. Rinse with fresh water after every saltwater launch. Monthly, spin each roller by hand — feel for grit, roughness, or play. Grease bearings annually (or per manufacturer schedule). Check fastener torque quarterly; vibration loosens everything. When loading solo, use a bow line led to your truck’s tow hook — control the boat’s approach speed so it kisses the rollers gently, not slams. On steep ramps, keep the boat tied to the trailer until the transom rollers engage. Then release. Never power-load onto rollers; prop wash erodes the ramp and can spin the boat sideways.
In winter, remove portable rollers and store dry. For permanent mounts, spray bearings with corrosion inhibitor and cover with a plastic bag taped shut. Inspect roller surfaces for cracks, flat spots, or embedded debris before each season. Replace worn rollers in pairs — mismatched diameters cause tracking issues. If your boat has a rigid keel strip, ensure the keel roller contacts it, not the tubes. Tubes deform; keel strips don’t. Adjust side rollers so they guide without squeezing — tubes need room to breathe under load. Finally, practice solo loading on a calm weekday before you need it for real. Muscle memory beats improvisation when the ramp is crowded and the tide is dropping.
How It Works for Me
My setup: 14-foot Achilles SGX with 25hp four-stroke, loaded weight around 420 pounds. Trailer has a centerline keel roller, two side rollers per side, and a V-block transom roller clamped to the stern. Launch routine: back down until transom rollers touch water. Unhook winch strap. Grab bow line from driver’s seat. Push boat aft — it rolls forward on the keel and side rollers, self-centering in the V-block. Once afloat, I tie off, park the truck, done. Three minutes solo. Loading reverses: nose into V-block, winch two clicks, boat centers itself. Drive up. No winching against friction. No scrambling on wet bunks. The rollers paid for themselves in saved chiropractor visits alone.
What I Like
The self-centering action of the V-block transom roller is the standout feature. The boat finds its groove every time, even when I approach crooked. Sealed bearings have gone three seasons without a squirt of grease — still spin like new. Stainless hardware shows zero rust despite weekly saltwater launches. The keel roller’s wide crown supports the rigid floor strip without point-loading. Side rollers adjust in 15 seconds with a wrench — crucial when switching between the Achilles and a smaller tender. Installation took 45 minutes solo with a cordless drill. The kit included marine sealant and anti-seize — thoughtful touches that prevent future headaches.
What Could Be Better
The clamp-on transom rollers can shift if you hit a submerged log hard enough. Bolt-through would be bombproof but requires drilling the transom — a commitment not everyone wants. The included U-bolts fit 2-inch trailer frames only; I had to source 3-inch U-bolts separately for my heavier trailer. Roller end caps are plastic; one cracked when I dropped the trailer tongue on concrete. Metal caps would survive that. Instructions show generic diagrams — boat-specific photos would help first-timers visualize final position. Price is mid-range; budget kits exist but cut corners on bearings and hardware. You get what you pay for, but a $20 hardware upgrade kit from the manufacturer would close the gap for DIYers.
My Personal Experience
Three years, 120+ launches, zero roller failures. One bearing started making noise at month 18 — spun it by hand, felt a click. Ordered the $12 replacement bearing kit, swapped in 10 minutes. That’s the total maintenance bill. I’ve launched in 20-knot crosswinds, on ramps covered in eelgrass, at low tide with 6 inches of water over the rollers. The system never hesitated. I’ve watched other boaters struggle with bunk trailers — winching, repositioning, cursing — while I float away. The confidence of knowing I can launch and load alone, anytime, anywhere, changed how often I go. No more waiting for a buddy. No more skipping marginal weather because “it’s too much hassle alone.” That freedom is the real product.
Recommendation
If you launch from ramps — even occasionally — install a keel roller and V-block transom roller at minimum. Add side rollers if your trailer bunks are wide or your tubes are large diameter. Skip the cheapest kits; the bearing and hardware difference shows up fast in saltwater. Bolt-through transom mounts beat clamps for permanence, but clamps work fine for seasonal removal. Measure your boat loaded, not empty. Buy 20% over capacity. Rinse after every salt use. Grease annually. That’s the formula. It’s not complicated, but each step matters. Do it once, do it right, and you’ll wonder why you waited.
How to Use Inflatable Boat Roller Effectively
Effective use starts before you hit the ramp. Check tire pressure on the trailer — low tires change roller contact angles. Verify the boat sits level on the trailer; a nose-high attitude loads the transom rollers prematurely. At the ramp, back down until the transom rollers are just submerged. This is the sweet spot: boat floats enough to roll free, but trailer still supports most weight. Unhook the winch. Keep a hand on the bow line. Give a gentle push. The boat should roll forward smoothly. If it binds, stop. Check for misaligned rollers or debris. Never force it.
Loading: approach the trailer slowly, aiming the bow at the V-block center. Let the current or wind do the fine steering — don’t power in. Once the bow kisses the V-block, give the winch two clicks. The boat will self-center. Winch the rest of the way. Don’t overspeed the winch; let the rollers do the work. On retrieval, if the ramp is steep and slick, keep the boat tied to the bow eye until the transom rollers engage. Then release. This prevents the boat from sliding back down before you’re ready. After loading, secure the transom tie-downs before pulling up the ramp. Rollers reduce friction, but they don’t replace tie-downs. Safety first, always.
Inflatable Boat Roller Alternatives
Bunk trailers with carpeted bunks are the traditional alternative. Cheap upfront, but friction fights you every launch. Add bunk glides (UHMW plastic strips) to reduce drag — helps, but still no match for rollers. Roller bunks (bunks faced with roller strips) split the difference — better than carpet, cheaper than full rollers, but less adjustable. Air-powered launch systems exist for commercial ops — overkill for recreation. Manual dollies and wheel sets work for beach launches under 100 pounds. Above that, you’re the roller. Winch-only loading (no rollers) works if you have a powerful winch and patience, but hull abrasion is guaranteed. The only true alternative that matches roller performance is a full roller trailer conversion — expensive, but the gold standard for heavy RIBs.
My Personal Recommendation
For most owners running 10- to 16-foot inflatables on bunk trailers, the CE Smith Transom Roller Kit paired with their Keel Roller Kit and Side Roller Kit covers every contact point with marine-grade hardware, sealed bearings, and 316 stainless fasteners. It’s not the cheapest, but it’s the last one you’ll buy. Check current pricing and fitment on Amazon — they often bundle all three kits with a discount. Install it this weekend. Your back will thank you Monday.
Quick Comparison Table
| Feature | CE Smith Kit | Yates V-Block Kit | Budget PVC Kit |
|---|---|---|---|
| Key Benefit | Sealed bearings, 316 stainless, 3-yr warranty | Self-centering V-block, heavy rubber rollers | Low cost, easy replacement parts |
| Price Range | $180-$250 (full 3-kit bundle) | $120-$160 (transom only) | $60-$90 (transom only) |
| Best For | Saltwater, frequent solo launch, 12-16 ft RIBs | Steep ramps, heavy tubes, DIY clamp-on | Freshwater, occasional use, under 12 ft |
FAQs
What is the best inflatable boat roller for saltwater?
CE Smith kits with 316 stainless hardware and sealed bearings resist corrosion best. Rinse after every use regardless.
How much does inflatable boat roller installation cost?
DIY costs $150-$300 for parts. Professional install adds $100-$200 labor. Most owners install themselves in an hour.
Can I install inflatable boat roller on any trailer?
Most bunk trailers accept roller kits. Measure bunk width and frame size first. Some narrow frames need adapter brackets.
Do rollers damage inflatable boat tubes?
Properly adjusted rollers protect tubes. Misaligned or worn rollers can chafe. Inspect contact points monthly.
How often should I replace inflatable boat rollers?
Quality rubber rollers last 5-7 years. PVC rollers 2-4 years. Replace when bearings fail or surfaces crack.
Can I use inflatable boat roller for kayak or canoe?
Yes, if weight and width fit. Kayaks need narrower roller spacing. Check manufacturer specs.
What maintenance does inflatable boat roller need?
Rinse after saltwater. Grease bearings annually. Check bolt torque quarterly. Inspect for cracks each season.
Are clamp-on transom rollers secure enough?
For boats under 500 lbs, yes. Over 500 lbs or rough launches, bolt-through is safer. Tighten clamps before each use.
Conclusion
An inflatable boat roller system is the single smartest upgrade for any small-boat owner who launches from a trailer. It protects your hull, saves your back, and unlocks solo freedom on the water. The installation is a Saturday-morning project. The maintenance is five minutes a month. The payoff is every launch for the next decade. I’ve lived both sides — the struggle and the glide — and there’s no comparison. Pick a quality kit, install it carefully, maintain it casually, and get back to why you bought the boat in the first place: being on the water. Your next launch is waiting.