
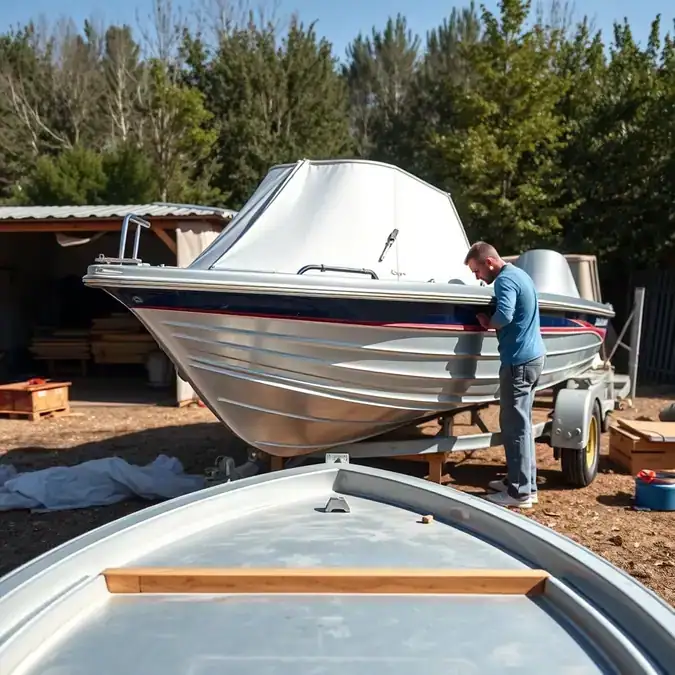
I was struggling with my old aluminium jon boat looking like a patchwork quill after years of sun, salt, and scrapes. Then I discovered the right prep routine and everything changed. If you want paint that actually sticks and lasts more than a season, you’re in the right place. I’ve painted maybe a dozen aluminium hulls over the years — some mine, some buddies’ — and I’ll walk you through every step that matters, from bare metal to ready-for-primer.
- Clean first, sand second, prime always — skip any step and the paint will fail
- Acid etching or conversion coating is non-negotiable on bare aluminium for lasting adhesion
- Epoxy primer beats everything else for water barrier and corrosion protection
- Temperature and humidity matter more than you think — follow the can specs
- Masking and ventilation aren’t optional — they save your health and your finish
How to Prepare an Aluminium Boat for Painting

Painting an aluminium boat isn’t rocket science, but it’s unforgiving. Miss a step and you’ll be scraping peeling paint by next summer. I learned this the hard way on my first boat — a 14-foot Smokercraft that I rushed through in a weekend. Six months later, the bottom looked like alligator skin. Since then, I’ve refined a process that holds up. This guide covers everything I know, in the order you’ll actually do it.
Why Preparing an Aluminium Boat for Painting Matters

Aluminium doesn’t rust like steel, but it oxidizes fast. That dull grey film? That’s aluminium oxide, and paint hates it. The oxide layer forms within hours of exposure to air. If you paint over it, you’re gluing paint to dust. Proper preparation removes that oxide, roughs up the surface for mechanical bite, and lays down a chemical bridge — usually a conversion coating or epoxy primer — that locks the system together. Skip it and you’re buying paint again next year.
The marine environment is brutal. UV breaks down binders. Salt water finds every pinhole. Temperature cycles expand and contract the hull, stressing the paint film. A well-prepped surface gives the coating system its best shot at surviving all three. I’ve seen boats go five, six years between paint jobs when the prep was done right. The ones I rushed? Barely made it through one season.
Benefits of Proper Aluminium Boat Paint Preparation

Doing it right pays off in ways that show up every time you launch:
- Paint adhesion that lasts years, not months — the coating becomes part of the surface, not a sticker on top
- Corrosion protection underneath — epoxy primer seals the metal from salt and moisture
- Less maintenance — no touching up flaking spots every spring
- Better fuel economy — smooth bottom paint reduces drag
- Higher resale value — buyers know a good paint job when they see one
- Peace of mind — you launch knowing the hull is sealed
The time you spend prepping is the cheapest insurance you can buy. A gallon of epoxy primer costs maybe $80. Repainting a botched job costs hundreds in materials and days of labor.
Types of Aluminium Boat Paint Preparation Methods

Not every boat needs the same treatment. The condition of your hull dictates the approach:
New or Bare Aluminium
Factory mill finish needs degreasing, light sanding, and conversion coating. No paint removal needed. This is the easiest scenario.
Previously Painted — Good Condition
If the old paint is sound, you can scuff-sand, clean, and overcoat. No stripping required. Test adhesion with a cross-hatch tape test first.
Previously Painted — Failing
Peeling, blistering, or chalking paint must come off. Chemical strippers, mechanical removal, or media blasting. Then treat as bare aluminium.
Corroded or Pitted
Heavy oxidation or pitting needs aggressive sanding or blasting, then filler for pits, then full prep sequence. This is the most work.
Popular Preparation Techniques for Aluminium Boats
Boat yards and DIYers use a few main approaches. Each has its place:
Hand Sanding with Conversion Coating
Classic DIY method. Degrease, sand with 80-120 grit, apply aluminium etch or conversion coating (like Alodine or a phosphoric acid wash), then epoxy primer. Low cost, high labor. Works great on small boats.
DA Sander + Epoxy Primer Direct
Skip the acid etch. Sand to bright metal with a dual-action sander, wipe with solvent, shoot epoxy primer within the recoat window. Some modern primers claim adhesion to sanded aluminium without conversion coating. I still prefer the etch belt-and-suspenders approach.
Media Blasting
Soda blasting, crushed glass, or aluminium oxide. Fast, uniform, gets into every crevice. Requires equipment or a pro shop. Best for larger hulls or heavily corroded boats. Must prime same day — flash rust starts fast.
Chemical Stripping + Mechanical Prep
Apply marine paint stripper, scrape, then sand and etch. Good for boats with multiple old layers. Messy, smelly, but effective. Wear serious PPE.
How to Choose the Right Preparation Method
Match the method to your situation:
| Boat Condition | Best Method | Time Required | Skill Level |
|---|---|---|---|
| New / bare aluminium | Hand sand + conversion coat | 1-2 days | Beginner |
| Good old paint | Scuff sand + overcoat | Half day | Beginner |
| Failing paint, small boat | Chemical strip + hand sand | 2-3 days | Intermediate |
| Failing paint, large hull | Media blast + epoxy prime | 1-2 days | Pro / advanced DIY |
| Heavy corrosion / pitting | Blast + fill + full system | 3-5 days | Advanced |
Ask yourself: how much time do I have? What’s my budget? Can I rent a DA sander or blast pot? Am I comfortable with chemical strippers? The “best” method is the one you’ll actually execute properly.
Tools and Materials You’ll Need
Gather everything before you start. Stopping mid-job to run to the store kills momentum and can blow recoat windows.
Safety Gear (Non-Negotiable)
- NIOSH-approved respirator with organic vapor cartridges (P100 filters for sanding)
- Nitrile gloves — boxes of them
- Safety glasses or face shield
- Tyvek suit or old clothes you’ll trash
- Ear protection for power tools
Cleaning and Degreasing
- Marine-grade detergent (Star brite, Aurora, or simple Dawn + water)
- Scotch-Brite pads (maroon/grey) and scrub brushes
- Clean rags — lots of lint-free cotton
- Acetone or dedicated wax/grease remover (Interlux 202, Pettit 120)
- Two-bucket wash system
Paint Removal (If Needed)
- Marine paint stripper (gel/cling formula for vertical surfaces)
- Plastic scrapers, putty knives
- Chemical-resistant brushes
- Pressure washer (optional but helpful)
Sanding and Abrasion
- Dual-action (DA) random orbital sander — 5″ or 6″ pad
- Discs: 80, 120, 180, 220 grit (aluminium oxide or ceramic)
- Hand sanding blocks
- Scotch-Brite rolls for hand scuffing
- Feather-edge discs for blending edges
Etching and Conversion
- Phosphoric acid etch (Pre-Kote, Alodine 1201, or DIY vinegar/water for small jobs)
- Pump sprayer (plastic, acid-resistant)
- Neutralizing agent (baking soda solution)
- Clean water source and hose
Priming and Painting
- Two-part epoxy primer (Interlux Interprotect 2000E, Pettit Hydrocoat, Epifanes)
- Mixing cups and stir sticks
- HVLP spray gun or roller/brush for primer
- Solvent for cleanup (epoxy reducer)
- Masking tape and paper/plastic (3M green tape, 1.5″+)
Step-by-Step: How to Prepare an Aluminium Boat for Painting
This is the core sequence. Follow it in order. Don’t skip. Don’t rush.
1. Strip the Boat
Remove everything: seats, rails, cleats, hardware, electronics, rub rails. If it’s not aluminium, it comes off. Mask what you can’t remove. Take photos of wiring and fastener locations. Bag and label hardware. This feels tedious. It saves hours of frustration later.
2. Wash Thoroughly
Hot water, marine detergent, stiff brush. Hit every inch. Rinse until water sheets without beading. Let dry completely. This removes salt, grime, fish slime, and loose oxidation. I wash twice — once to get the heavy stuff, once to be sure.
3. Degrease with Solvent
Wipe the entire hull with acetone or wax/grease remover using the two-rag method: one rag wet with solvent to dissolve contaminants, second clean dry rag to wipe it off before it evaporates. Rotate rags constantly. Don’t just smear the grease around. This step is invisible but critical. Fingerprints, chain lube, sunscreen — all will cause fisheyes in primer.
4. Remove Old Coatings (If Applicable)
If paint is failing, strip it now. Apply stripper per directions, let dwell, scrape. Repeat until bare metal. Pressure wash residue. Let dry. Re-degrease. On my last project, three coats of old bottom paint took two full stripper applications and a lot of elbow grease. Worth it.
5. Sand the Aluminium
This is where the magic happens. Goal: uniform, bright, scratched surface with no shiny spots.
- Start with 80-100 grit on DA sander for bare or stripped hulls
- Use 120-150 grit if scuffing good existing paint
- Keep the sander moving — don’t dwell or you’ll heat the metal
- Overlap passes 50%
- Hand-sand edges, corners, and tight spots
- Finish with 180-220 grit for primer adhesion profile
Wipe with tack cloth, then solvent wipe again. The surface should feel like 220-grit sandpaper — uniform tooth, no gloss.
6. Acid Etch / Conversion Coating
This step chemically converts the surface oxide to a phosphate or chromate layer that epoxy primer grabs onto. It also prevents future oxidation under the paint.
Mix phosphoric acid etch per label (usually 1:4 to 1:10 with water). Spray evenly. Keep wet for 3-5 minutes — don’t let it dry. Scrub lightly with Scotch-Brite. Rinse thoroughly with clean water. Neutralize with baking soda solution (1 cup per gallon). Rinse again. Let dry completely. The surface should turn a uniform dull gold/grey. No white powder residue.
Pro tip: If water doesn’t sheet evenly after rinse, you missed a spot. Re-etch that area.
7. Final Solvent Wipe
One last acetone wipe with clean rags. Two-rag method. This removes any etch residue, dust, or skin oils. After this, don’t touch the hull with bare hands. Wear clean gloves.
8. Mask and Protect
Mask waterlines, through-hulls, transducers, trailer bunks contact points. Use quality tape — cheap tape bleeds adhesive or lifts. Cover the ground with plastic. Set up ventilation if indoors. Check temperature and humidity against primer specs.
9. Apply Epoxy Primer
Mix two-part epoxy exactly per ratio. Induction time matters — let it sit if the label says so. Apply 2-3 mils wet film thickness (check with wet film gauge). Two coats minimum, three is better. Respect recoat windows — too soon causes solvent entrapment, too long requires sanding. I shoot three coats at 1.5 mils each, 2-4 hours apart at 70°F.
Roll and tip if brushing: foam roller for laydown, badger brush for tip-off. Work in 2-foot sections. Maintain wet edge. Don’t overwork it.
10. Inspect and Fair
After primer cures (overnight minimum), inspect in bright light. Look for pinholes, thin spots, dust nibs. Spot-prime defects. Light sand with 320 grit if recoat window passed. Fair any low spots with epoxy thickened with filler. You’re now ready for topcoat or bottom paint.
Cleaning and Degreasing the Hull
I can’t stress this enough: clean aluminium is the foundation. Aluminium holds oils in its pores. Even brand-new hulls have rolling oils from the mill. Old boats have years of wax, fuel residue, and grime.
Use a dedicated boat wash — not dish soap regularly (strips wax but leaves surfactants). Scrub with the grain if there’s a visible grain. Rinse until zero beading. Let dry 2+ hours in sun or overnight. Then solvent wipe. The two-rag method is non-negotiable. One wet, one dry. Flip and fold constantly. When rags come clean, you’re done.
I’ve seen primer fisheye on hulls that “looked clean.” Trust the process, not your eyes.
Removing Old Paint and Coatings
There’s no magic easy button here. Chemical strippers work but are messy. Heat guns work on flat surfaces but warp thin aluminium. Sanding alone takes forever on thick buildup. Media blasting is fastest but requires gear.
For DIY on a small boat, I like gel stripper + plastic scrapers + DA sander finish. Work in sections. Strip, scrape, wash, sand. Don’t strip the whole boat then sand — the bare aluminium will oxidize while you work. Strip one section, prep it, move on. Or strip all, then etch and prime same day.
Test adhesion on remaining paint with a razor blade cross-hatch and duct tape. If paint pulls, it all comes off. If it holds, you can scuff and overcoat.
Sanding Aluminium for Paint Adhesion
Sanding does two things: removes oxide and creates mechanical tooth. Aluminium is soft — 80 grit cuts fast. Don’t use aggressive ceramic discs on bare aluminium; they’ll leave deep scratches that telegraph through primer. Aluminium oxide or zirconia discs are gentler.
DA sander technique: light pressure, slow arm speed, 50% overlap. Let the tool do the work. Check often — wipe dust, look for uniform scratch pattern. Shiny spots = low spots or missed areas. Hit them again.
Hand sanding: use a firm block. Sand with the grain on extrusions. Cross-hatch on flat plate. Finish grit depends on primer — check the tech sheet. Most epoxy primers want 80-180 profile. Too fine = poor adhesion. Too coarse = shows through thin primer.
Acid Etching and Conversion Coatings
This is the step most DIYers skip or botch. Bare aluminium forms oxide instantly. Conversion coating replaces that unstable oxide with a stable, paint-receptive layer.
Phosphoric Acid Etch (Wash Primer Alternative)
Common brands: Pre-Kote, Deoxidine, or generic phosphoric acid. Dilute, spray, dwell, scrub, rinse, neutralize. Cheap, effective, forgiving. My go-to for DIY jobs.
Chromate Conversion (Alodine 1201, Bonderite)
Industry standard for aviation and military. Better corrosion inhibition. More toxic, stricter handling, harder to find in small quantities. Yellow/gold color shows coverage. If you can get it and handle it safely, it’s the gold standard.
Zirconium/Titanium Conversion (Newer, Chromate-Free)
Products like SurTec 650. Environmentally friendlier, clear coating (harder to see coverage), excellent performance. Gaining traction in yards.
Whichever you use: follow the label exactly. Concentration, temperature, dwell time, rinse — all matter. And prime within the window (usually 24-48 hours max).
Applying Primer: The Critical Step
Epoxy primer is the backbone. It’s the water barrier, the corrosion inhibitor, the glue for everything above. Don’t cheap out. Single-part primers, etch primers, “aluminium primers” in rattle cans — they’re not in the same league.
Two-part epoxy primer: mix ratio exact. Induction time observed. Pot life respected. Apply at recommended film build. Two coats minimum, three preferred. Sand between only if recoat window exceeded.
Roller vs spray: spray gives better film build control and smoother finish. Roller is fine for primer if you tip it off. Foam roller (1/4″ nap), then badger brush or foam brush to break bubbles and lay down. Work fast. Epoxy sets up quick in heat.
Film thickness: use a wet film gauge. 3-4 mils wet per coat typical. Dry film target 4-6 mils total. Too thin = pinholes. Too thick = solvent entrapment, cracking.
Common Mistakes to Avoid
I’ve made most of these. Learn from my pain:
- Skipping the solvent wipe after sanding — dust and oils kill adhesion
- Etching then waiting a week to prime — oxide reforms, etch wasted
- Priming in direct sun on hot metal — solvent flashes, pinholes, poor flow
- Ignoring dew point — condensation you can’t see ruins the bond
- Using cheap masking tape — bleed-through, adhesive transfer, torn edges
- Thinning epoxy primer “for better flow” — breaks the chemistry, voids specs
- One coat of primer — pinholes are inevitable in one coat
- Sanding through primer to bare metal and not re-etching — that spot will rust
- Painting over silicone or polysulfide sealant — nothing sticks to silicone
- Rushing recoat windows — solvent entrapment = blisters later
Tips for Using Preparation Products Effectively
Little things that make a big difference:
- Work in the shade — hot metal flashes solvents, cold metal traps moisture
- Check dew point — metal temp must be 5°F above dew point minimum
- Use a wet film gauge — guesswork builds bad habits
- Mix small batches — epoxy exotherms in the cup, shortens pot life
- Strain primer — cheap insurance against clumps and contamination
- Keep a wet edge — lap marks in primer show through topcoat
- Label everything — mixed epoxy, reducer, wash thinner — all look clear
- Clean gun between coats — or wrap in plastic if within pot life
- Document your process — photos, notes, product codes — helps next time
How It Worked for Me
Last spring I prepped my neighbor’s 16-foot Lund. Ten-year-old bottom paint, chalking, few blisters. We stripped with gel remover over two evenings. DA sanded with 80 then 150 grit. Phosphoric etch, neutralize, dry. Three coats Interprotect 2000E rolled and tipped. Two coats Trilux 33 bottom paint. Launched in May. Pulled in October — zero growth, zero blisters, color holding. He’s sold on the process now. The difference between “looks okay” and “actually protected” is all in the prep you can’t see.
What I Like About This Process
It’s repeatable. Once you learn the rhythm — clean, sand, etch, prime — it scales from a jon boat to a 25-footer. The products are available at any marine store. No magic tools required beyond a DA sander and respirator. And the results are honest: do the work, get the years. Cut corners, pay later. That clarity is rare in boat projects.
What Could Be Better
The etch step adds dry time and chemical handling. Some newer primers claim direct-to-metal adhesion on sanded aluminium. I’ve tested a couple — they work okay on clean, fresh-sanded metal in controlled conditions. But in the real world — humidity, dust, delays — I still sleep better with the conversion coating. It’s cheap insurance. Also, stripping old paint is just miserable work. No way around it. If anyone invents a stripper that doesn’t smell like a chemical plant and works in 15 minutes, I’ll buy stock.
My Personal Experience
First aluminium boat I painted was that Smokercraft. I pressure washed, sanded with a palm sander, wiped with mineral spirits, rolled on single-part primer and bottom paint. Looked great at launch. By August, the bottom was peeling in sheets. I had to strip it all off in the driveway that fall — chemical stripper, scraper, hours of cursing. Did it right the second time. That boat’s still running with the same paint job, seven years later.
Since then I’ve done my brother’s 18-foot tracker, a friend’s 22-foot bay boat, a couple of duck boats. Every one that got the full prep sequence is still holding. The one I rushed for a buddy’s tournament? Peeling at the transom by September. The hull doesn’t care about your schedule. It only cares about the surface you give it.
My Recommendation
If you’re painting an aluminium boat this year, commit to the full sequence. Budget two weekends — one for strip/prep, one for prime/paint. Buy quality epoxy primer (Interprotect 2000E, Hydrocoat, or Epifanes). Use phosphoric acid etch — it’s forgiving and cheap. Rent a DA sander if you don’t own one. Wear the respirator. Follow the tech sheets like they’re law. Your future self — the one hauling the boat next fall — will thank you.
Ready to start? Grab the Interlux Interprotect 2000E epoxy primer and a quart of Star brite Pre-Kote aluminium etch. They’re the combo I trust.
Alternative Preparation Approaches
Not every situation fits the full sequence. Here are valid alternatives:
Overcoating Sound Existing Paint
If adhesion test passes, scuff with 180-220 grit, solvent wipe, epoxy prime. Saves days. But you’re locking in whatever corrosion is under the old paint. Only for boats you know the history of.
Single-Part Primer Systems
Products like Pettit Rustlok or Interlux Primocon. Easier application, no mixing. Less water resistance, shorter life. Okay for freshwater trailer boats with low hours. Not for saltwater or liveaboards.
Professional Blast and Prime
Yard blasts to SSPC-SP10, primes same day. Best result, highest cost ($2,000-5,000+ for 20-footer). Worth it if you’re doing a full refit or the hull is badly corroded.
Ceramic/Epoxy Coatings (e.g., Ceram-Kote, Aluma Hawk)
Single-part, high-build, direct-to-metal claims. Some guys swear by them. I’ve seen mixed results — great on trailers, questionable on immersed hulls. Test on a small area first.
Quick Comparison Table
| Feature | Full Epoxy System | Single-Part Primer | Pro Blast + Epoxy |
|---|---|---|---|
| Durability (years) | 5-7+ | 2-4 | 7-10+ |
| DIY Difficulty | Moderate | Easy | N/A (pro) |
| Material Cost (20ft) | $300-500 | $150-250 | Included |
| Labor Time | 2-3 weekends | 1-2 weekends | 2-3 days |
| Corrosion Protection | Excellent | Good | Best |
| Best For | Saltwater, long-term | Freshwater, trailered | Refits, bad corrosion |
FAQs
Do I need to etch aluminium before painting?
Yes. Etching or conversion coating removes the oxide layer and creates a surface that epoxy primer chemically bonds to. Skipping it risks delamination within a year.
Can I paint over old bottom paint on aluminium?
Only if the old paint passes a cross-hatch adhesion test. If it’s sound, scuff-sand with 180 grit, solvent wipe, and apply epoxy primer. If it fails, strip it all.
What grit sandpaper for aluminium boat prep?
80-100 grit for initial sanding on bare or stripped aluminium. 120-150 for scuffing good paint. Finish with 180-220 before primer. Never finer than 220 for epoxy primer adhesion.
How long after etching can I wait to prime?
Most conversion coatings require priming within 24-48 hours. Check the product data sheet. Oxide reforms fast — don’t push it.