
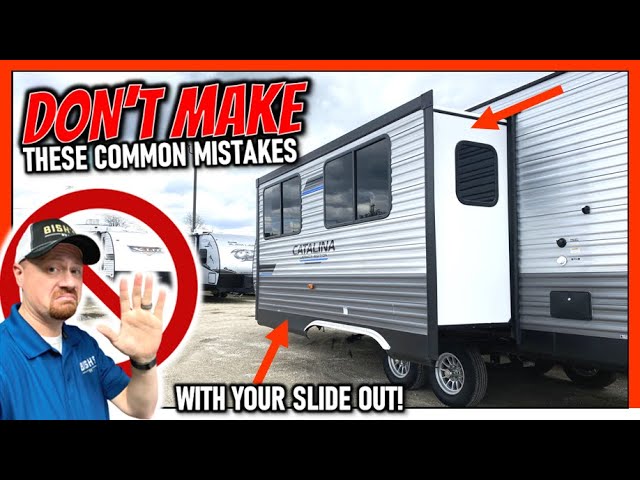
How to Fix a Sticking RV Slide Out: A Step-by-Step Guide
Your 2022 Jayco Greyhawk slide out keeps sticking closed? You are not alone. Many RV owners face this issue every season. The good news is that you can fix most slide-out problems yourself. You just need the right steps and a bit of patience.
This guide walks you through the full process. You will learn how to spot the cause, gather what you need, and get your slide-out moving smooth again. Whether the issue is battery power, dirty tracks, or a stuck motor, we have you covered.
Estimated Time: 1 to 3 hours depending on the cause.
Difficulty Level: Easy to Moderate.
Primary Objective: Get your slide-out extending and retracting without sticking or grinding.
Before You Start: Tools, Gear & Preparation
Before you touch anything, gather your tools and check the scene. Working on a slide-out is safe when you plan ahead. Always make sure your RV is on flat ground. Turn off all slide-out power before you start. Disconnect shore power if you can. This keeps you safe from electrical shorts.
| Item / Tool | Purpose | Optional / Required |
|---|---|---|
| Multimeter | Check battery voltage | Required |
| Screwdriver set (Phillips and flathead) | Remove panels and access switches | Required |
| Silicone-based lubricant or RV-rated grease | Lubricate tracks and rollers | Required |
| Clean rags or shop towels | Wipe down tracks and seals | Required |
| Soft-bristle brush or old toothbrush | Scrub dirt out of track channels | Required |
| Flashlight or headlamp | See inside dark track areas | Required |
| Battery charger (12V) | Boost low battery power | Optional |
| Wire strippers and electrical tape | Fix loose or frayed wires | Optional |
| Replacement fuse (matching amperage) | Swap a blown fuse | Optional |
Safety Check: Make sure the RV is parked on level ground. Set the parking brake. Never try to force a slide-out by hand if it feels stuck hard. That can damage the motor or the frame rails.
Step-by-Step Guide to Fixing Your Sticking Slide Out
Step 1: Check the Battery Voltage
Most slide-out problems start with low battery power. Your 2022 Jayco Greyhawk uses a 12V system to run the slide-out motor. If the battery is weak, the motor will not have enough force to move the slide fully. It may hum but not budge, or it may stop halfway.
Set your multimeter to DC voltage. Touch the red probe to the positive terminal and the black probe to the negative terminal. A healthy battery reads 12.6V or higher. If you read below 12.2V, your battery needs a charge.
Even if your RV is plugged into shore power, the battery still matters. The converter charges the battery, but if the battery is old or bad, it may not hold a charge. Try running the slide-out after charging the battery fully. Notice if it moves smoother.
Captain’s Note: Keep a portable 12V battery charger in your RV kit. A dead battery is the number one cause of slide-out failures. A quick charge often fixes the problem in minutes.
Step 2: Inspect and Reset the Fuses
After battery power, the next most common cause is a blown fuse. Your Jayco Greyhawk has a fuse box that protects the slide-out circuit. A short in the motor or wiring can blow a fuse and stop the slide-out dead.
Find your fuse panel. It is usually inside the RV near the control panel or under a access door. Look for the fuse labeled “Slide Out” or “Slide.” Pull it out and check the metal strip inside. If it looks broken or dark, the fuse is blown.
Replace it with a fuse that matches the amperage rating printed on the fuse box cover. Never use a higher-amp fuse. That can cause a fire or fry the motor. Once you swap it, try operating the slide-out again.
Ask yourself: did the fuse blow right after a storm or a power surge? If so, there may be a deeper electrical issue. Check the wiring in the next steps.
Step 3: Clean the Slide-Out Tracks
Dirty tracks are the second most common reason a slide-out sticks. Dirt, dust, road grime, and dead bugs build up inside the track channels. This creates friction that the motor cannot overcome. The slide may extend but not retract, or it may grind and stop.
Open the slide-out fully if it will move. Use your flashlight to look inside both the inner and outer track channels. You will likely see a thick layer of gunk. Use your soft-bristle brush to scrub the debris loose. A toothbrush works great for tight spots.
Wipe the tracks clean with a dry rag. Then use a slightly damp rag to get the last of the dirt. Let the tracks dry completely before moving to the next step. Do not use high-pressure water to clean tracks. That can push water into bearings and cause rust.
Trail Hack: Clean your slide-out tracks every three months or after each camping trip. A quick 10-minute wipe-down prevents most sticking problems before they start.
Step 4: Lubricate the Tracks and Rollers
Once the tracks are clean and dry, it is time to lubricate. Use a silicone-based lubricant or RV-rated grease. Spray or apply a thin, even coat along the full length of both track rails. Focus on the roller wheels and the areas where the slide-out carriage rolls.
Do not use WD-40 or regular oil-based lubricants. They attract dirt and dust and can degrade rubber seals over time. Silicone lubricant is safe for rubber seals and does not gum up.
After applying lubricant, manually slide the slide-out in and out a few times. This helps the lubricant spread into all the contact points. You should feel the slide move much smoother. If it still catches, check for visible damage to the rollers.
Look at each roller wheel. Are any cracked, flat, or missing? Worn rollers cause uneven movement and can make the slide bind on one side. Replace damaged rollers as needed.
Step 5: Inspect the Seals and Trim
Sometimes the slide-out sticks because the rubber seal is pinched or damaged. The seal runs along the edge of the slide-out where it meets the RV body. If it is dried out, cracked, or pushed into the track area, it can block movement.
Run your hand along both sides of the seal. Feel for tears, hard spots, or areas where the seal has peeled away from the frame. Use your flashlight to look at the seal from the side. Check if any part of the seal is folded into the track channel.
If the seal is dry and cracking, apply a small amount of RV-specific rubber conditioner. This keeps the rubber soft and flexible. Do not use petroleum-based products on rubber seals. They cause the rubber to swell and degrade faster.
If the seal is torn or permanently deformed, replace it. A bad seal not only causes sticking but also lets water leak into your RV. Water damage inside walls is one of the most expensive RV repairs.
Step 6: Try the Manual Override
If the motor runs but the slide will not move, you may need to use the manual override. Most Jayco Greyhawk slide-outs have a manual release lever. This lets you move the slide by hand when the motor fails or the battery is dead.
Locate the manual override kit. It is usually mounted on the motor housing or near the slide-out chassis. It looks like a small lever or a detachable rod. Refer to your owner’s manual for the exact location on your 2022 model.
Attach the manual override tool to the motor shaft. Then pull or push the slide-out slowly by hand. You should feel it move along the tracks. If it moves rough, go back to Step 3 and clean the tracks more thoroughly. If it moves smooth, the motor may need service.
Captain’s Note: Keep the manual override tool stored inside your RV at all times. You never know when you will be stuck at a campsite with a dead battery and no shore power.
Step 7: Check for Track Alignment Issues
If the slide-out sticks on one side only, the tracks may be misaligned. This happens after bumps, hard impacts, or if the RV was loaded unevenly. A shifted track can cause the carriage to bind or jam.
Look at both track rails from the front and back of the RV. Are they parallel? Use a tape measure to check the gap between the rails at the front and the back. The gap should be the same on both sides. If one side is tighter, the rail may have shifted.
To fix minor misalignment, loosen the track mounting bolts slightly. Gently tap the rail into position with a rubber mallet. Retighten the bolts evenly. Do not over-tighten. You want the rail snug but not bent.
If the misalignment is severe or the rail is bent, you may need a professional weld or replacement. Do not force the slide out if the track is clearly bent. You risk cracking the frame or damaging the motor gear.
Step 8: Test the Slide-Out Fully
After completing all the steps above, it is time to test. Reconnect any disconnected wires or plugs. Turn the slide-out power back on. Use the wall switch or remote to extend the slide fully.
Watch the slide as it moves. Does it extend smooth and even? Does it stop at full extension without straining? Now try to retract it. Does it pull back without grinding or stopping?
If everything moves smooth, you are done. If it still sticks, go back and recheck each step. Sometimes the problem is a combination of issues. Dirty tracks plus a weak battery can make the motor work twice as hard.
Write down what you fixed and when. This helps you track maintenance and spot patterns before bigger problems occur.
Common Mistakes & Troubleshooting
Even with the best steps, things can go wrong. Here are the most common mistakes and how to fix them.
Problem: The slide-out motor runs but will not move at all.
Cause: Likely a dead battery, blown fuse, or a stripped gear inside the motor.
Quick Fix: Check battery voltage first. Then check the fuse. If both are good, the motor gear may be stripped and needs replacement.
Problem: The slide-out extends but only goes halfway.
Cause: The motor may be weak, or the limit switch may be misadjusted.
Quick Fix: Clean and lubricate the tracks. Check the limit switch near the motor. It tells the motor when to stop. If it is bumped out of position, gently push it back.
Problem: The slide-out retracts but gets stuck on one corner.
Cause: Misaligned track or a worn roller on one side.
Quick Fix: Check track alignment with a tape measure. Replace the worn roller. If the track is shifted, loosen bolts and realign.
Problem: The slide-out makes a grinding noise.
Cause: Lack of lubrication or debris in the track.
Quick Fix: Clean the tracks thoroughly and apply silicone lubricant. Check for metal shavings, which signal a worn gear.
Problem: The slide-out works fine when plugged in but not on battery power.
Cause: The battery is too weak or the converter is not charging it.
Quick Fix: Charge or replace the battery. Test the converter output with a multimeter. It should read around 13.5V to 14.5V when running.
Frequently Asked Questions About RV Slide-Out Sticking
How do I manually override the slide-out on my Jayco RV?
Most Jayco models have a manual release lever on the motor housing. Attach the override rod or tool, then push or pull the slide by hand. Check your owner’s manual for the exact location and method. Keep the tool stored inside your RV year-round.
What is the best sealant for an RV slide-out?
Use an RV-specific silicone-based lubricant for tracks and a rubber conditioner for seals. Products like MC Leary’s NPC-12 or similar RV-rated treatments work well. Avoid petroleum-based products because they dry out rubber seals over time.
Why isn’t my RV slide-out extending fully?
The most common reasons are low battery voltage, dirty tracks, a misadjusted limit switch, or a worn motor gear. Start by checking battery power. Then clean and lubricate the tracks. If the slide moves but stops short, the limit switch may need adjusting.
How much does RV slide-out repair cost?
Simple fixes like cleaning tracks or replacing a fuse cost little to nothing. A new motor runs 200 to 600 dollars. Track realignment or seal replacement runs 150 to 400 dollars at a shop. Doing the work yourself saves most of that cost.
What is the RV slide-out reset button?
Some RVs have a reset button on the slide-out motor or control board. It trips when the motor draws too much current. If the slide stops suddenly and will not restart, wait a few minutes and press the reset button. Check your wiring diagram or owner’s manual for the exact location.
Final Thoughts
Fixing a sticking slide-out on your 2022 Jayco Greyhawk does not have to be hard. Most of the time, the fix is simple: clean the tracks, add lubricant, and check the battery. A little regular care goes a long way toward keeping your slide-out running smooth season after season.
If you followed all the steps and the slide-out still sticks, the issue may be inside the motor or the frame rails. That is when it is time to call a certified RV technician. But for most owners, the steps above will get you back on the road with a working slide-out.
Now get out there and enjoy the open road, the calm lake, and the campsite that has your name on it. Your slide-out is ready. You are ready.